George Stephenson at Blackheart Enterprises asked Rusty to write an article on his paint up of the bust, and his article now appears on the Blackheart website. You find the find the article by clicking the banner link below.
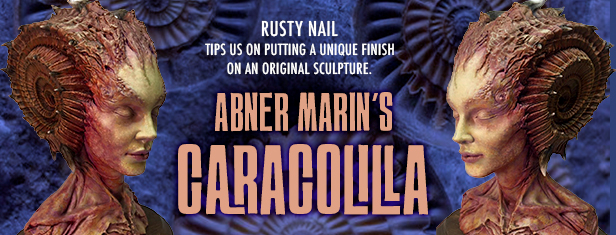
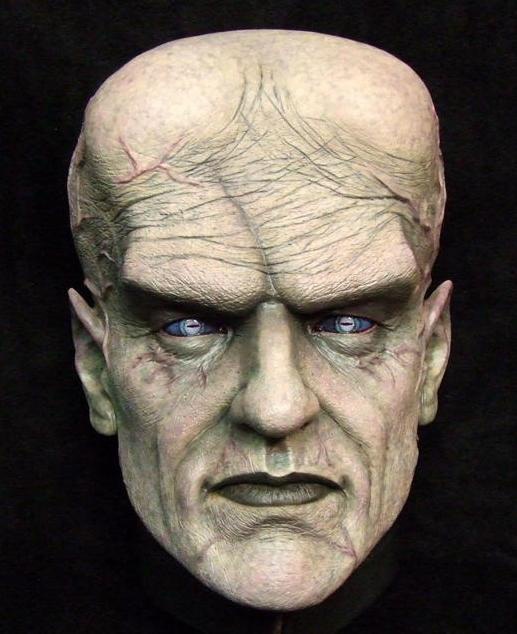
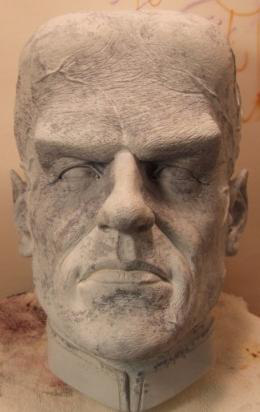
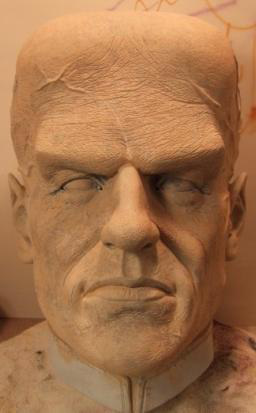
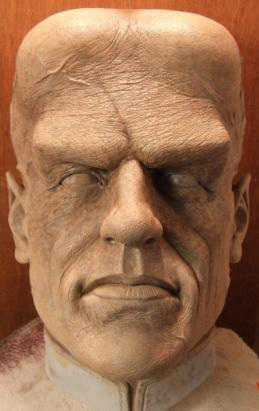
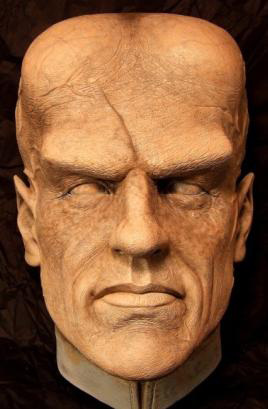
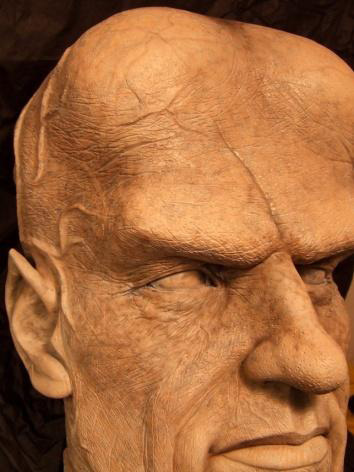
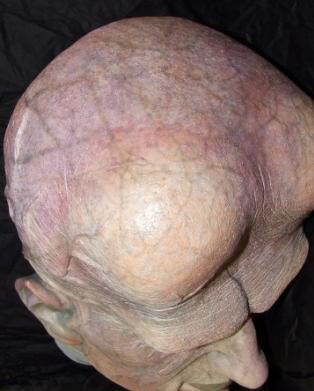
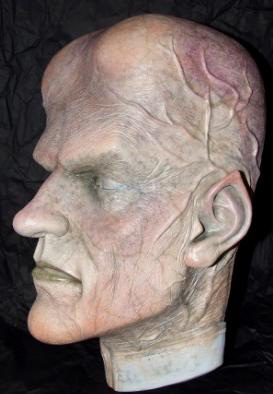
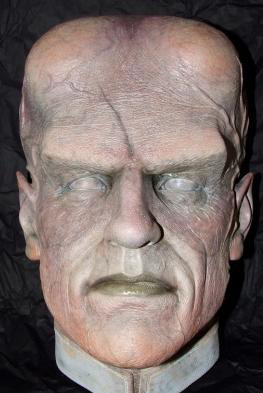
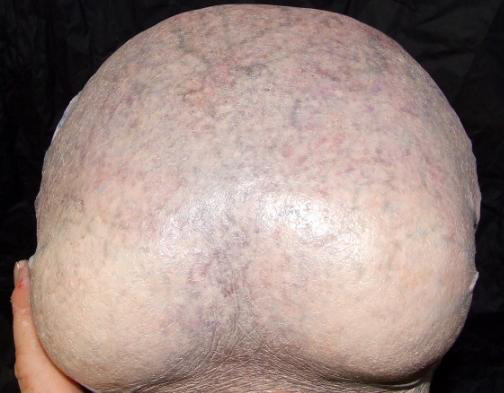
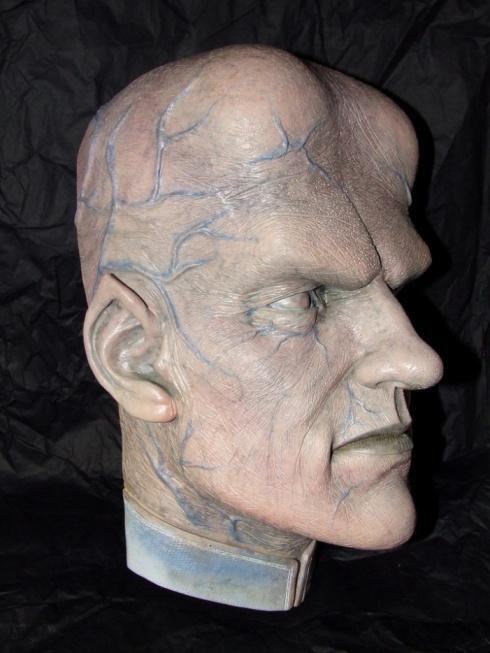
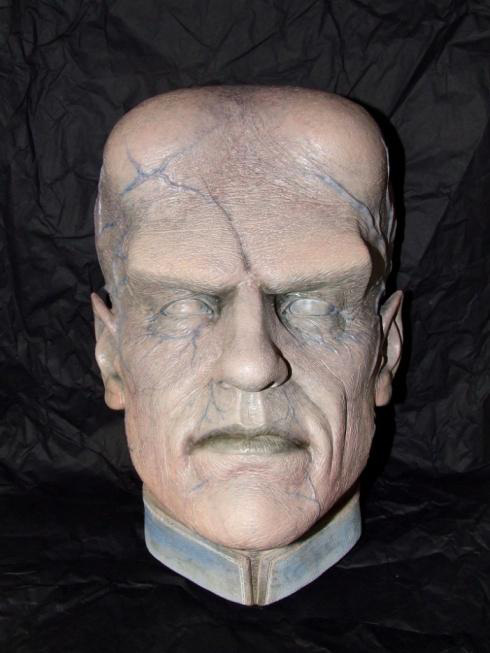
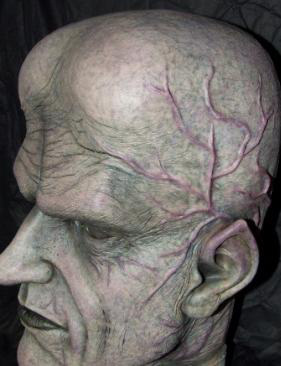
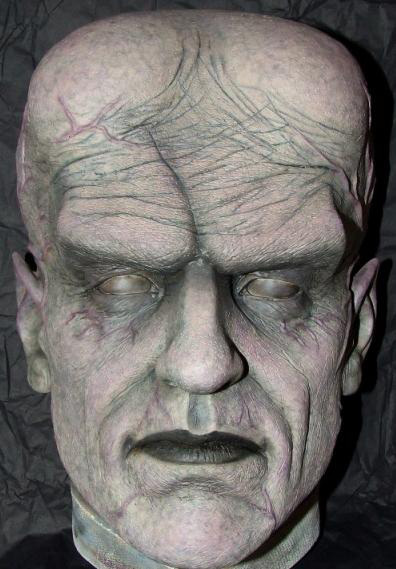
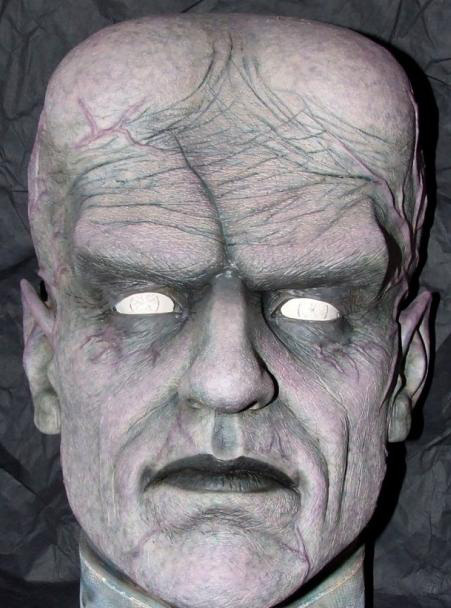
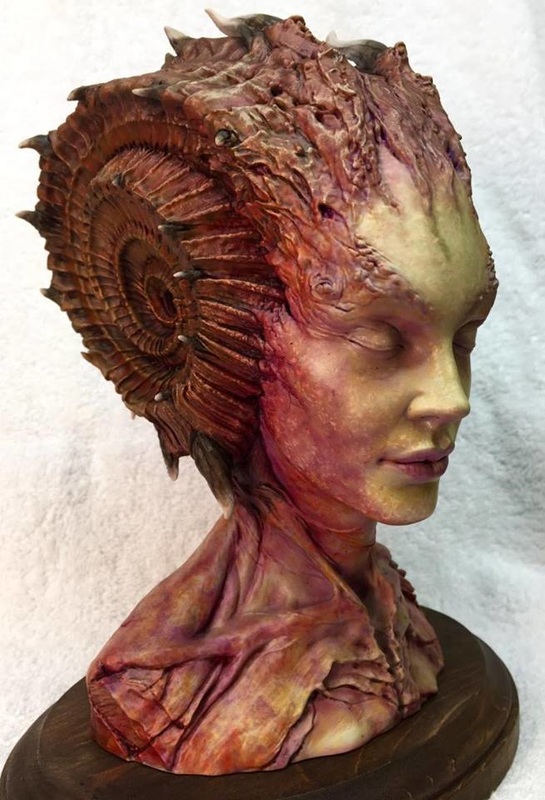
Rusty Nail recently painted up Abner Marin's Caracolilla bust, produced by Blackheart Enterprises. This bust earned Rusty a gold medal at the Atlanta Model Figure Show in February, and with this awared, he was named Show Master.
George Stephenson at Blackheart Enterprises asked Rusty to write an article on his paint up of the bust, and his article now appears on the Blackheart website. You find the find the article by clicking the banner link below.
0 Comments
By: Rusty Nail Article Courtesy of Black Heart Models In honor of Halloween, here's an old article by Rusty Nail. Enjoy! Rusty Nail is an accomplished Garage Kit artist living in Edgemont, Arkansas. In 2010, Black Heart was looking for an artist to write a step-by-step article documenting a cool paint job on The Thing from Another World wall-hanger; Rusty was drafted for the project. We told him that, without hair or fur or scales or fangs or other obviously monstrous features, this was a project that required something really special for this Thing. Rusty went the extra mile writing a step-by-step article on the alien’s skin tones and demonstrated the eyes of a thing that could only have come from another world. Rusty entered his Thing (the model!) in the model contest at the Chicago Figure Show in 2010 and won Gold. The kit won Gold again at the Little Rock, Arkansas Model Show contest in 2010 and was also awarded the coveted Black Swamp Modelers’ Society Trophy at that show. The Thing then won Silver at the WonderFest 2011 model competition in Louisville, Kentucky. Thanks for making us look good, Rusty. I was a kid when I first saw the ‘50s sci-fi classic, The Thing from Another World (1951). I must have seen it on one of those Saturday morning monstermania theater shows and I recall being scared out of my pants! It was one of the better science fiction/horror movies on TV back in those days. The title creature was a hostile alien frozen in Antarctic ice for thousands of years before being revived by a group of scientists. The Thing was played by the late James Arness, best-known for his role as Marshal Matt Dillon from the popular TV western, Gunsmoke. Contrary to some reports, Mr. Arness was always fond of his role in the film and, in a letter written for publication after his death, he referenced his pride in the role and his appreciation for fans of the film. Joe Simon has hammered out an incredible likeness for this 1:1 scale wall-hanger. It looks just like James Arness! And my Black Heart’s Thing prototype by Joe Simon plan was to nail the paint job. Since the head is molded in one piece, there is no assembly required and no cleanup beyond washing it with soap and water. Finishing The Thing This is a straight painting project and, since the movie was in black and white, the color scheme is pretty open and allows more freedom to paint it how I like. In the movie, the creature was, in essence, a plant. So, I decided to use colors that would give the notion of an eggplant. Using my trusty Harder and Steinbeck Infinity airbrush I prime the head with a mixture of white primer (Freestyle brand) and five drops of black primer (Reaper). This makes a light grey color. I can’t say enough about this airbrush. It’s precision, handling and looks make for a superior weapon for your painting arsenal. I then sponge on Paynes Grey (Liquitex) mixed with Floetrol. This leaves the paint semi-transparent. The results look a little stark at this point, but most of it will be covered up. (Image 1) I then sponge a medium flesh color (Liquitex) mixed with Floetrol. I allow some of the grey to still show through. (Image 2) Using my Infinity, I began pre-shading around the eyes, temples, under cheeks and inside the ears. This was done using transparent smoke (Comart). I also do some mottling and deep veining with this color. (Images 3-5) Using a sea sponge again, I sponge dioxide purple (Liquitex) mixed again with Floetrol and apply it to the top of the head, cheeks, tip and bridge of nose. I also sponge a little to the ears. Again back with the sponge using burnt sienna (Liquitex) and Floetrol, I sponge over the top of the purple areas previously done. I also sponge the two frontal lobes, upper cheeks, top of the chin and under chin. I add a little to the jaw line and sides of neck and then spray the whole head with Dull Cote to protect my work. I do some deep veining with transparent black green (Freestyle) on the lips, the inner eyes, ears, and under chin. I used transparent Mars Red (Freestyle) to mottle over the purple areas previously painted. (Images 6-9) After the mottling is done, I switch back to sponging with a mix of medium and light flesh (Dermacote) over the entire head. I also paint the raised veins with ultra marine blue and chrome green (Comart). I do some light sponging again to the raised veins with the same flesh mixture and a little more floetrol added to the mix. (Images 10 and 11) A raw umber (Liquitex and Liquitex Medium Gel) glaze is applied to the entire head and then wiped away with a lent free cloth. Another sponging is done with some light blue (Liquitex) and light flesh (Dermacote) over the entire head again. I lightly mottle the entire head with black green (Freestyle). I do some very light sponging with violet (Liquitex)to random areas of the face. A concise sponging is done with a mixture of flesh (Dermacote) and alzirum crimson (Liquitex) over the top of the head, cheeks, chin and along the neck area. Then I paint the raised veins again with dusty pink (Freestyle). I give it a nice cote of dull cote again. A light spray of dusty pink is also used on all the prominent raised areas. Shading grey (golden) is lightly applied to the eye area, nostril folds, cheek folds, middle and upper lips. The temples, ears and collar line are also shaded with the same color. The area is sprayed with another layer of dull cote. I then do some pin washes on the forehead and various other areas such as the outer corners of the eyes using Asurmen blue (Citadel washes). I open up the airbrush to about 20 psi and spray a wash of light flesh (Dermacote) which was cut 50/50 with golden airbrush medium over the entire head. I am careful not to let it build up in any specific areas, just an overall wash. I then spray a very thinned down wash of smoke (Tamiya) over the entire head again, including the lips. (Images 12 and 13) I painted the entire orb of the eyes with buck skin tan (Freestyle), then I penciled in where the iris should be. (Image 14) Eyes for The Thing I had really wanted to do something freaky with The Thing’s eyes but I was worried that the folks at Black Heart might not like something as freaky as I had planned. I went ahead and painted alien-looking eyes and was convinced that they were probably too much, too alien, for this article. So, I re-painted him with human-looking eyes, photographed him (see photo below), and sent the article and photos to Black Heart. When George and I talked after he got the photos, I realized he really wanted something non-human for the eyes, something different than anything he had ever seen. George loved the human-looking eyes I had done but we both felt something other-worldly, something inhuman would have been even better. So, I went back to my original freaky-eyed design. I painted the upper lid a dark brown and the lower lid a dark pink color. Then I chose colors for the eyes that would complement the skin tones I used. I glazed over the entire orb of the eye with a medium shade blue. The blue gave me a good starting point. Then I painted the pupil a light gray. Next came the fun part of the whole process. After laying down the basic colors, I covered the entire orb of the eye with five minute epoxy. While it was wet but just starting to set up, I used various shades of blues, purples, pinks and dark grays throughout the sclera (white part of the eye). I chose enamels because they seem to work better with the epoxy. I basically used a 00 paint brush and painted striations throughout the area leading up to the pupil edge. I then used black to paint tiny dots in the pupil and painted the iris a horizontal wedge shape. I let it set up and then repeated the process three times with each layer using the different shades throughout the eye. Doing this gives the eyes depth and a realistic sheen. There you go. Eyes only an Alien Mother could love! A Subtle Shift
CASM held its’ Sproo-Doo show/contest yesterday and there was a turnout of contestants from Arkansas, Tennessee, Louisiana, and Florida. There were many very fine models presented for judging and competition. Most all of the models were technically well-executed with many details added, clean construction, and awesome paint jobs. However, I noticed a slight shift in the use of color on many of the award winning models for the “Best of” categories. Often the selection of “Best of” came down to a choice between two models that stood out from the rest. Both models would be beautifully constructed with many additional details added or fabricated that enhanced the model. The color scheme used by both models was accurate for the piece, but the one that often won the category was the one that was more aesthetically pleasing to the eye. Several of the category winners spoke with me about this shift to the aesthetic and mentioned that their thinking about painting models had undergone a transformation over the past few years. The technical methods of painting were generally unchanged but the selection of colors to create contrast and extenuate detail had changed. The use of black white colors to influence shading had been mostly discarded from their palette of colors used for the model. These colors were replaced by colors that are darker and complementary to the general paint scheme or lighter and harmonious to the paint scheme. The color selection was extended to the composition of the base which resulted in a harmonious presentation that was aesthetically pleasing. Historical accuracy was not lost but harmony of color emphasized other qualities of the piece. The concepts of complementary and harmonious colors are commonly used in figure painting and are related to the relationship of colors that are often graphically displayed on a color wheel. Some people have a natural eye for color relationships but others, like me, have to use devices like the color wheel to see color relationships. Complementary colors are ones that are opposite one another on the color wheel while harmonious colors are next to, analogous, the base colors. Using these color relationships produces a piece that is not only historically accurate but also draws a viewer’s eye to the piece. I could tell the pieces that were rendered in this manner by watching spectators at the show. Invariably, the models where people lingered or could later be heard discussing amongst one another were the models that used a more harmonious color scheme. A clean paint job and accurate, well-executed, details are pre-requisites for additional consideration at a contest but the modelers who have taken the next step and are using color theory, whether they know it or not, to guide color selection are starting to take the brass ring. Looking across the model entrants at the show/contest yesterday the use of the color shift was readily apparent. Models completed by specific modelers in aircraft, armor, and Sci-Fi stood out amongst the other entries and there were more models completed in this manner represented than when compared to previous years. There is a subtle shift in the way in which models are rendered and that shift was noticeable yesterday. |
Archives
February 2017
|