Build Log of the Dragon MIM-104B Patriot PAC-1 w/M983 HEMTT in 1/35 scale PART 2 By Richard Geraci
Steps 16-30 are for the HEMTT itself so let's get started. The main sprues “J” & “K” are from the old Italeri kit and they definitely show their age. Lots of flash, soft detail, and the plastic is softer as well. Sprue “E” replaces some parts and adds others to convert it from the M977 to the M983. We'll see how well they fit together compared to the Trumpeter M983 version which I've built twice already (THAAD and AN/TPY-2).
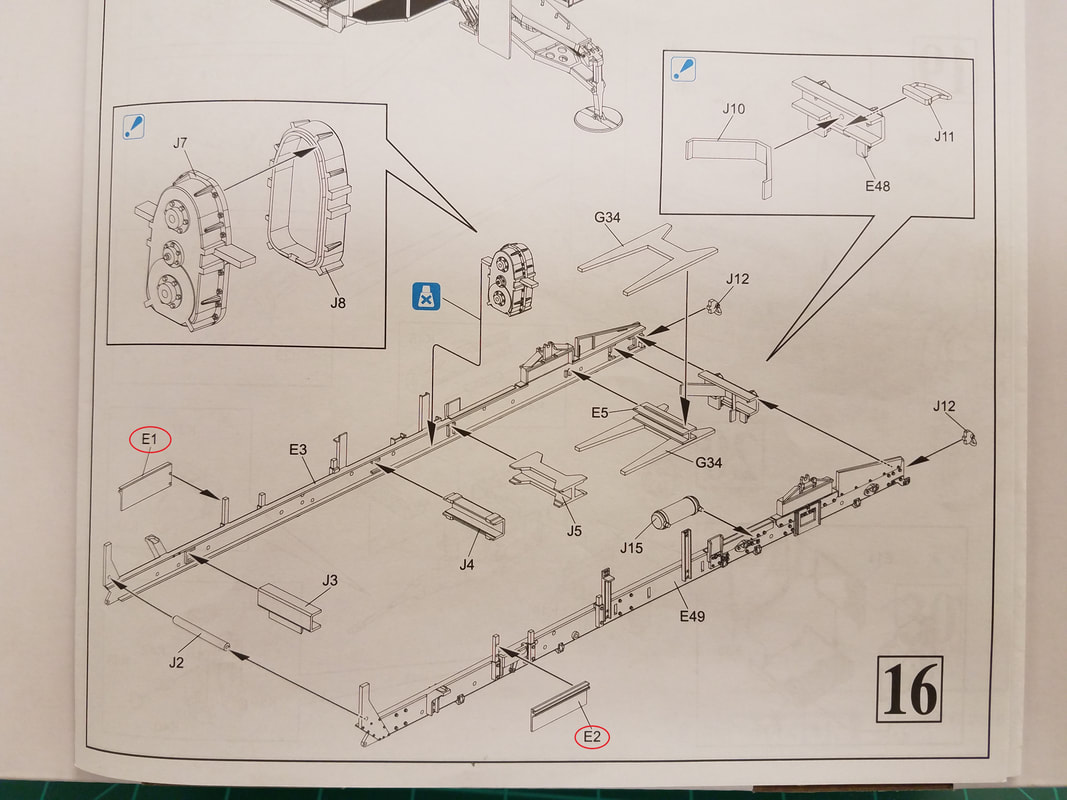
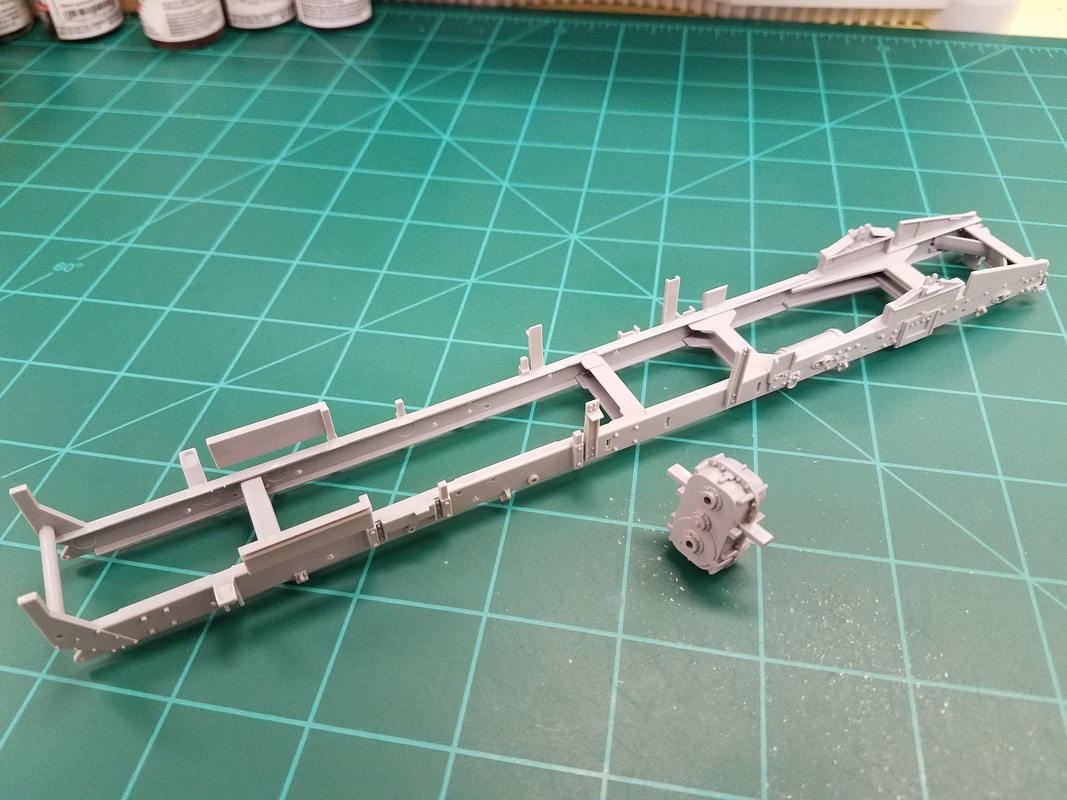
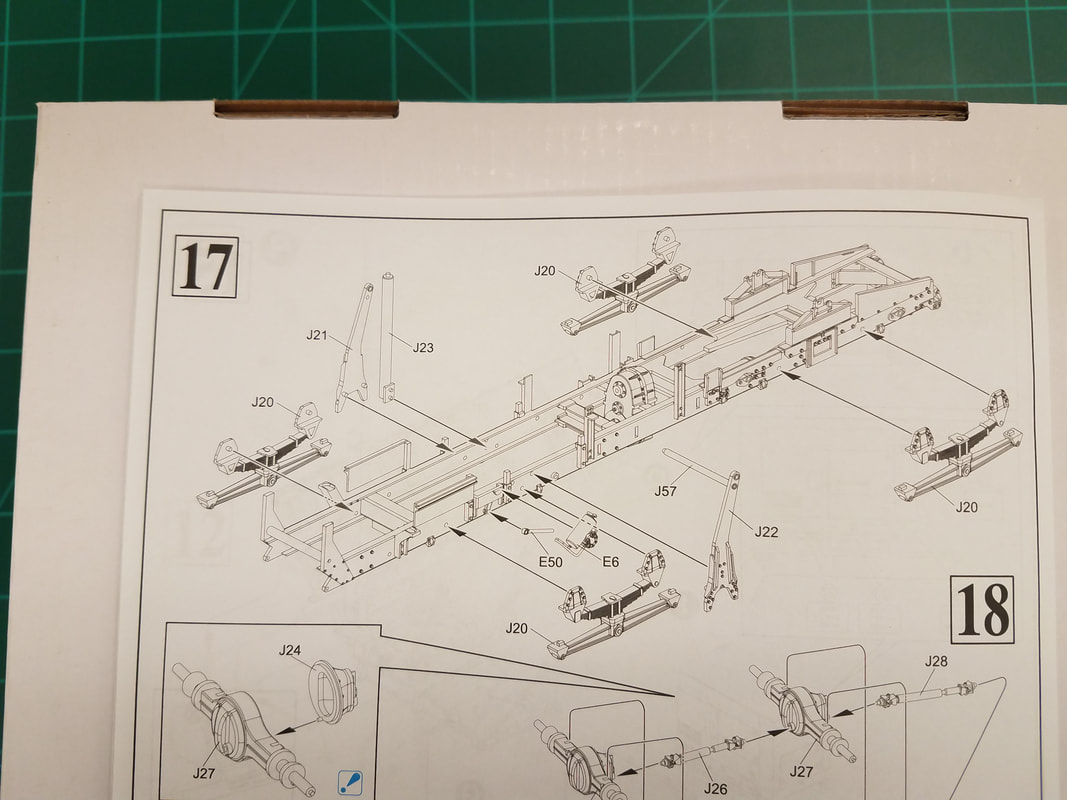
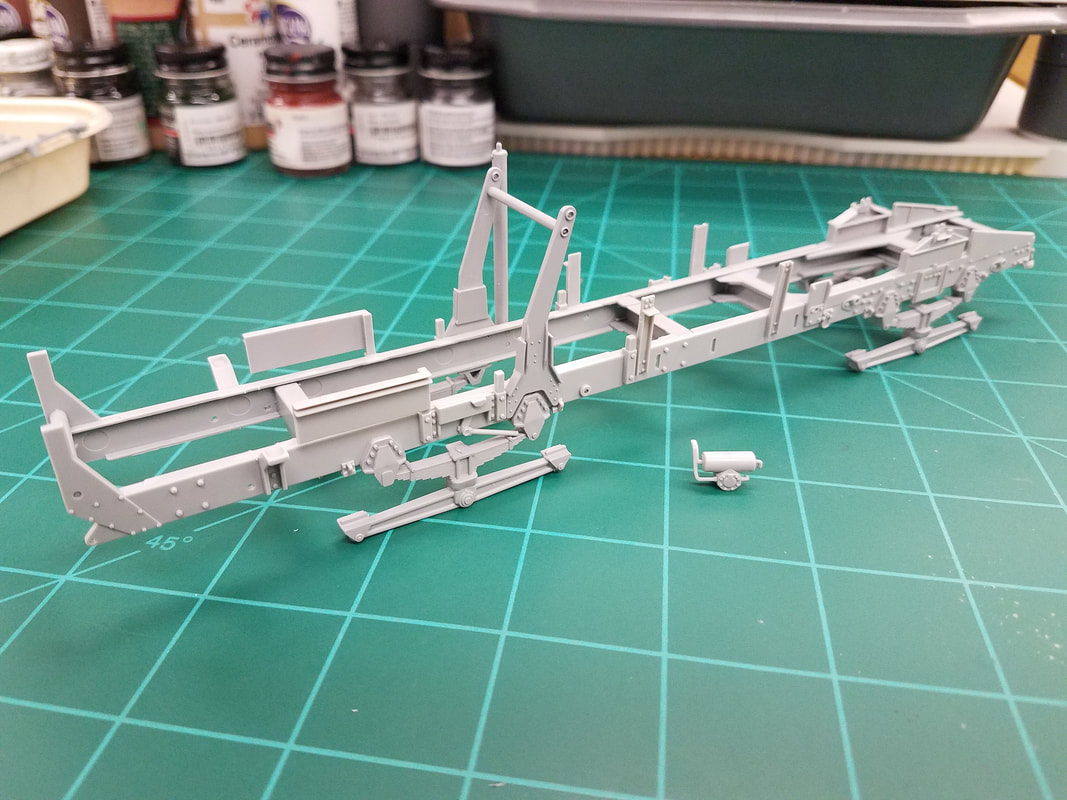
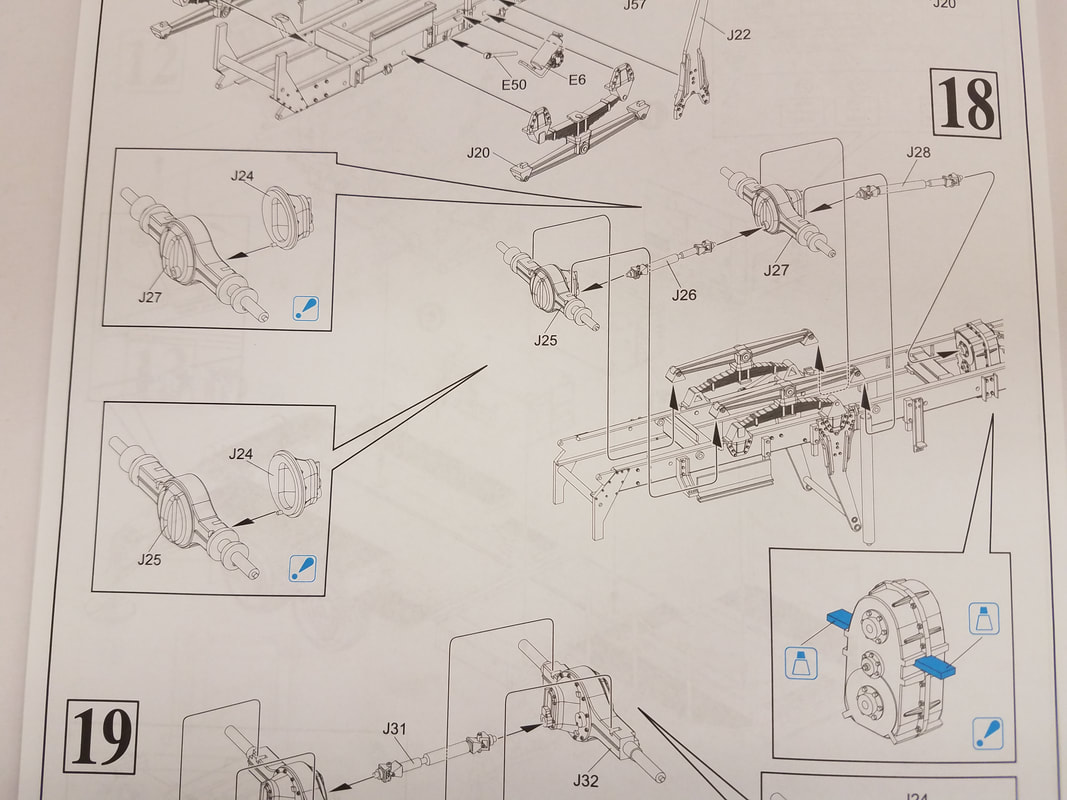
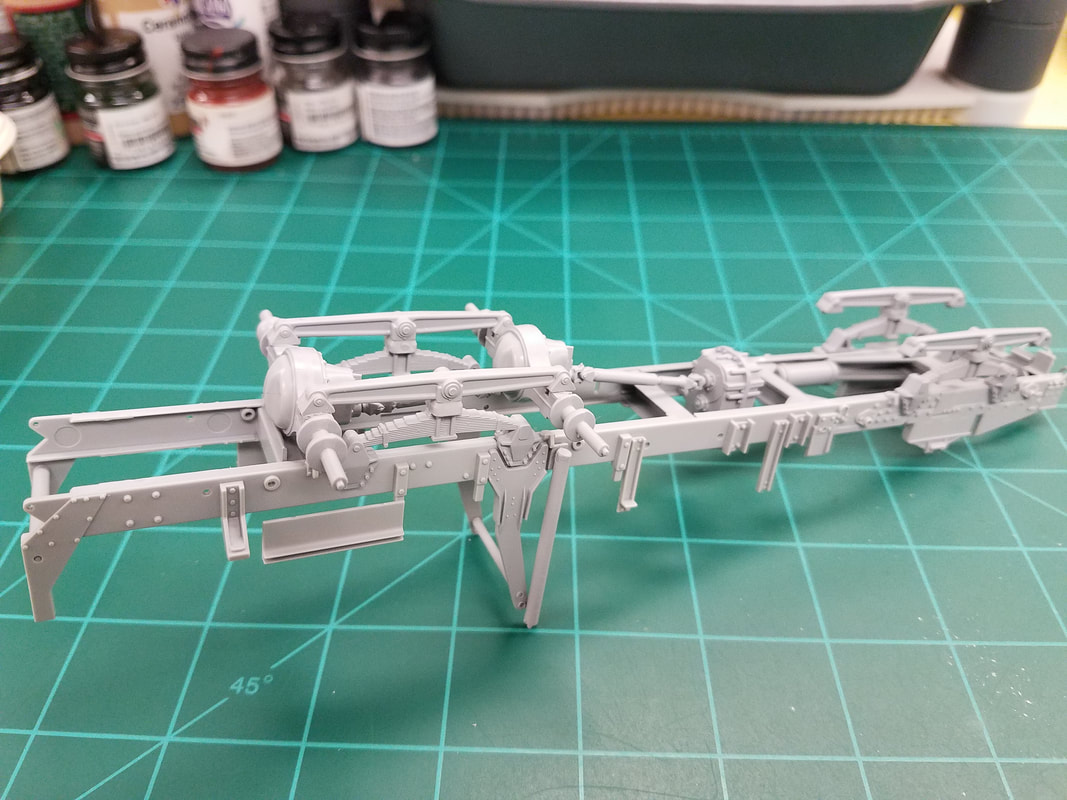
In Step 16 [1] you assemble the basic vehicle frame. Note the part numbers closely and be sure you have the correct sprue in your hand. It is hard to tell the old part from the replacement one in some cases. Another numbering snafu here: parts E1 and E2 are reversed. Also note the J7/J8 housing parts do not match the illustration [2]. Step 17 [3] adds the suspension springs. I have left part E6 off until later because it sits at an angle and the locator pin does not give a positive fit [4]. Step 18 [5] adds the front axles. Note the differential in the main illustration matches the part shape while it doesn't in the blowup illustration. The orientation is also rotated. Here is how it goes: J28 goes in the top hole of the side with two holes. The case sits on the bottom inside of the siderail in the illustration. It is actually the top when the frame is flipped over as in the step 17 illustration. Part J28 is angled so rotate it for a proper fit [6].
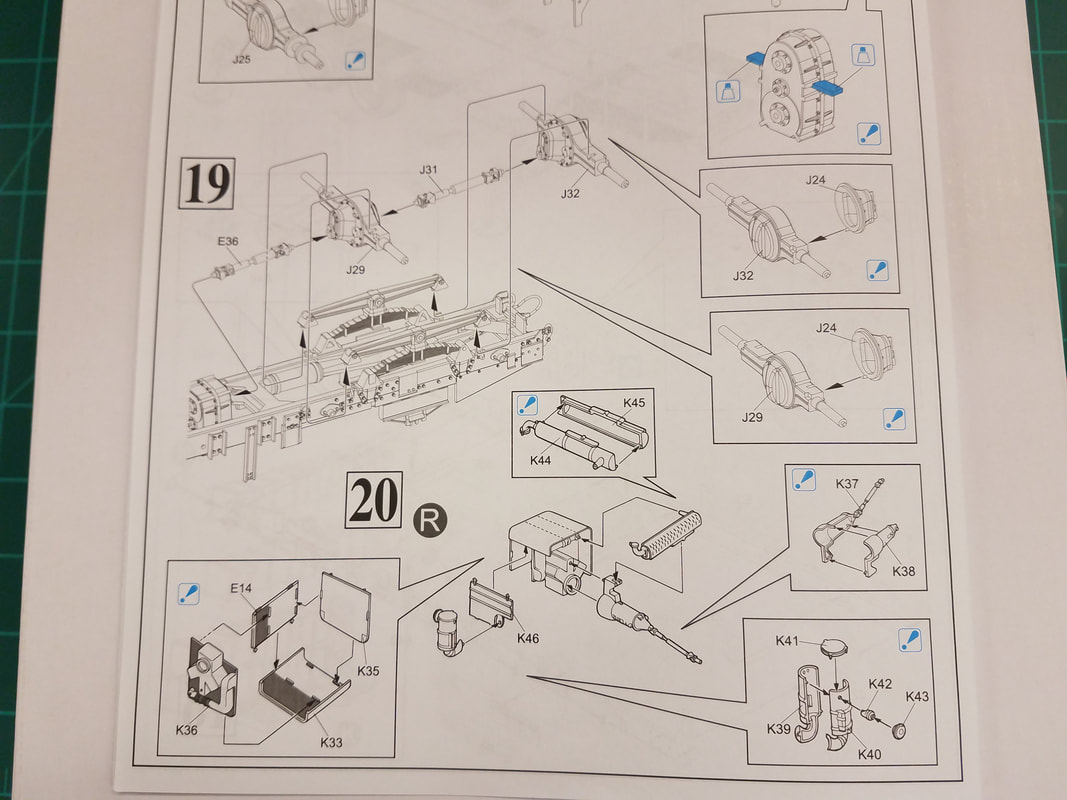
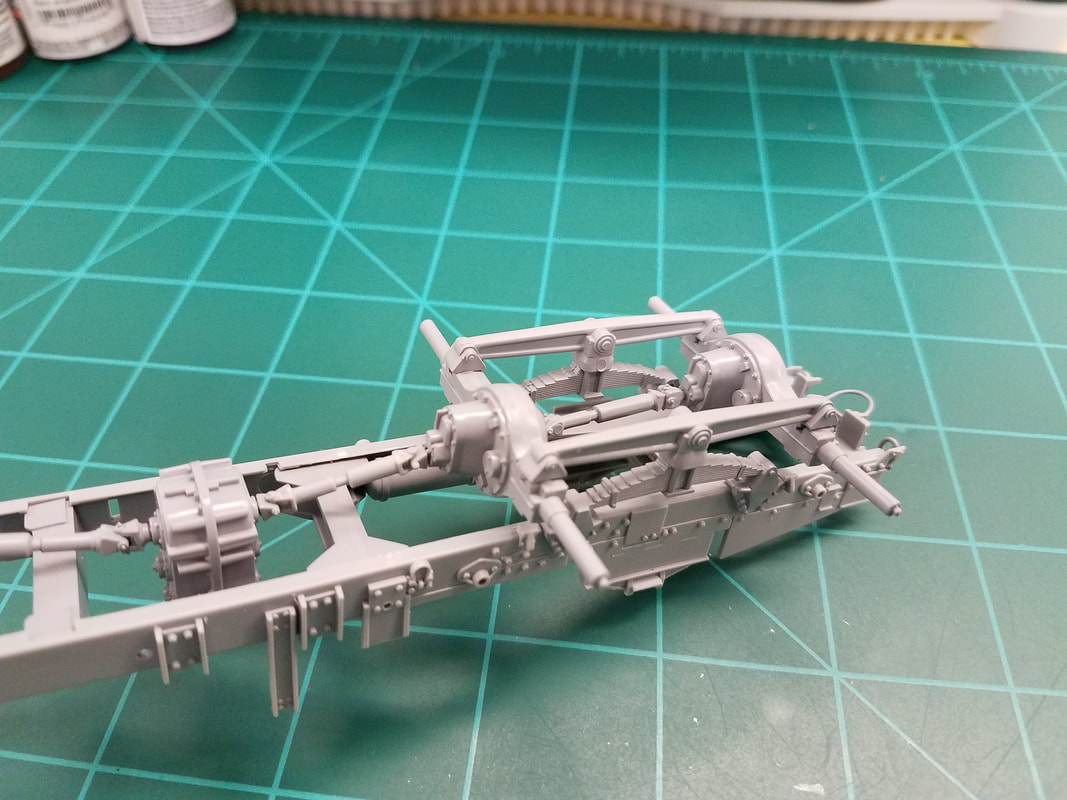
Step 19 [7] adds the rear axles. The chassis should look like this now [8].
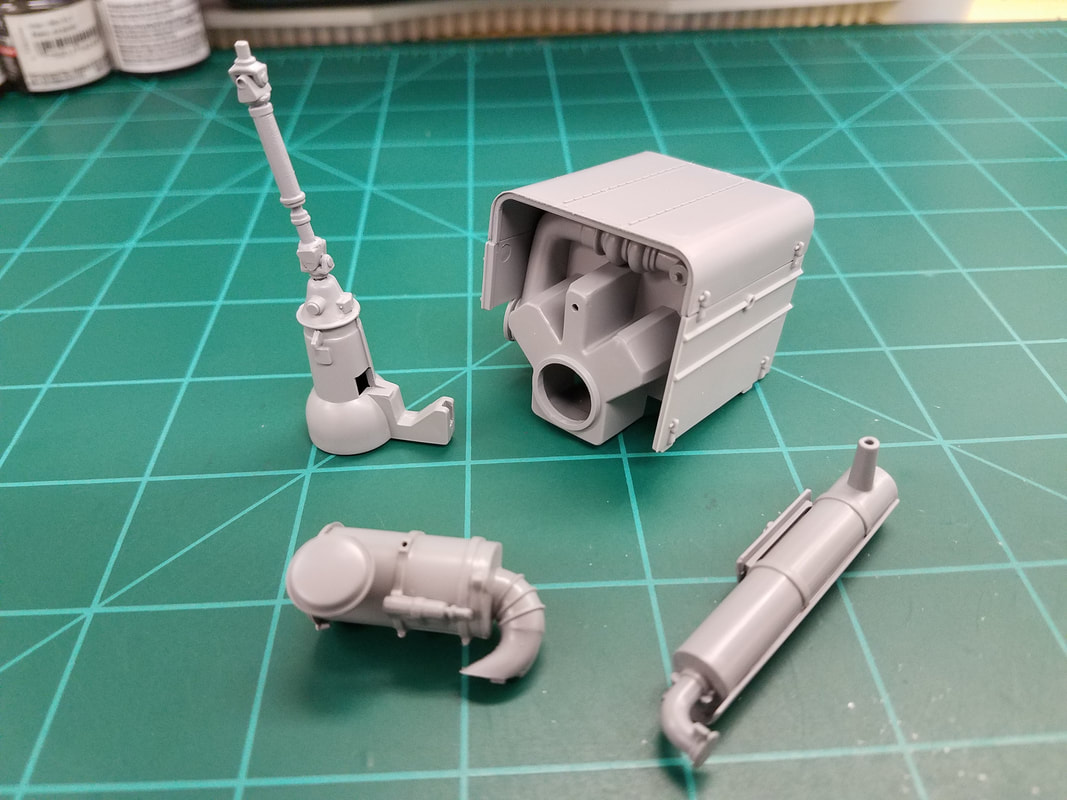
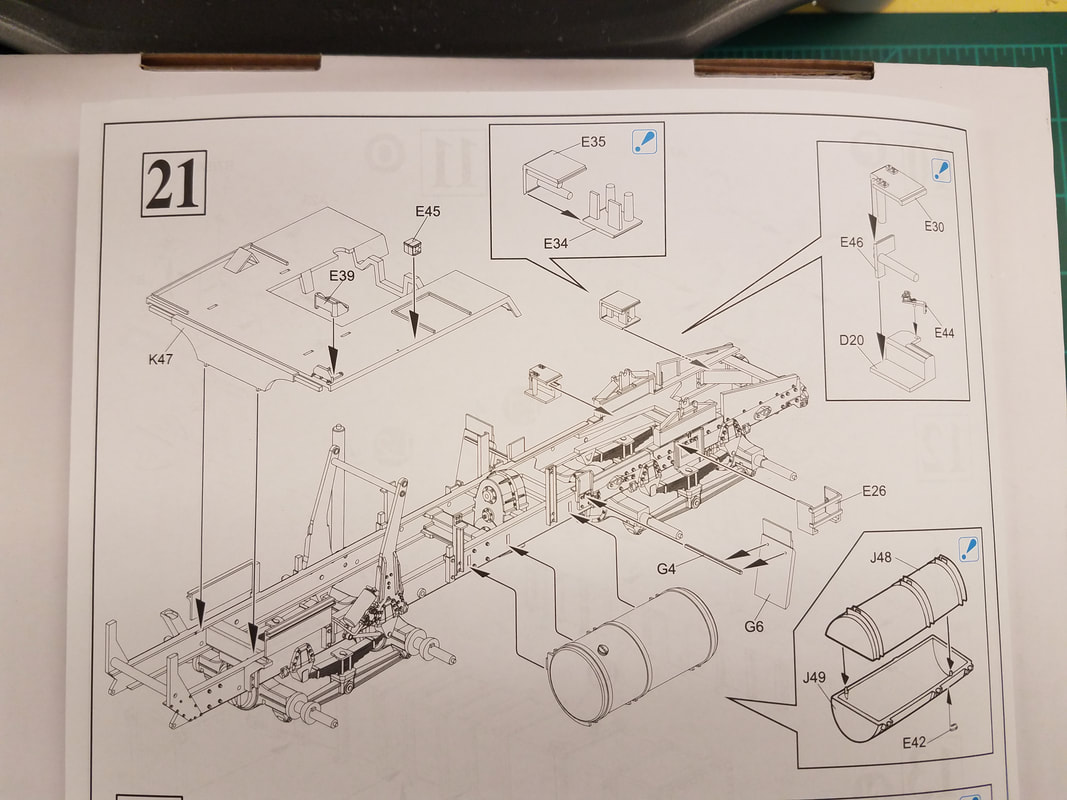
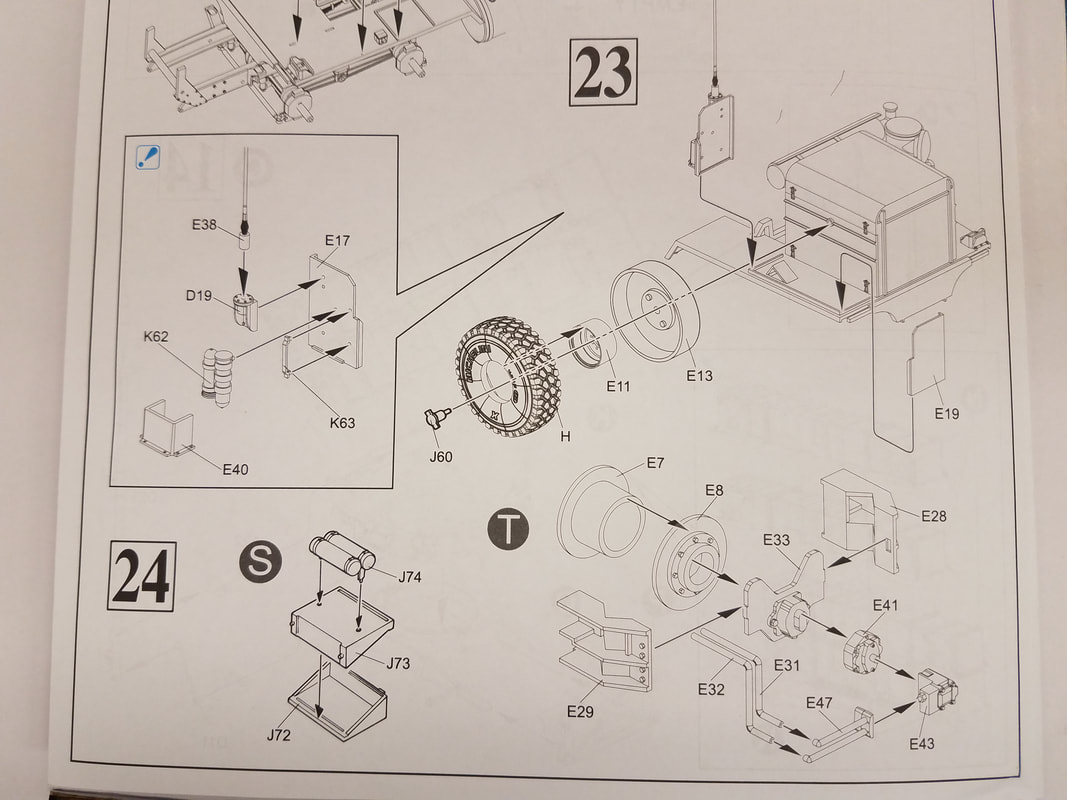
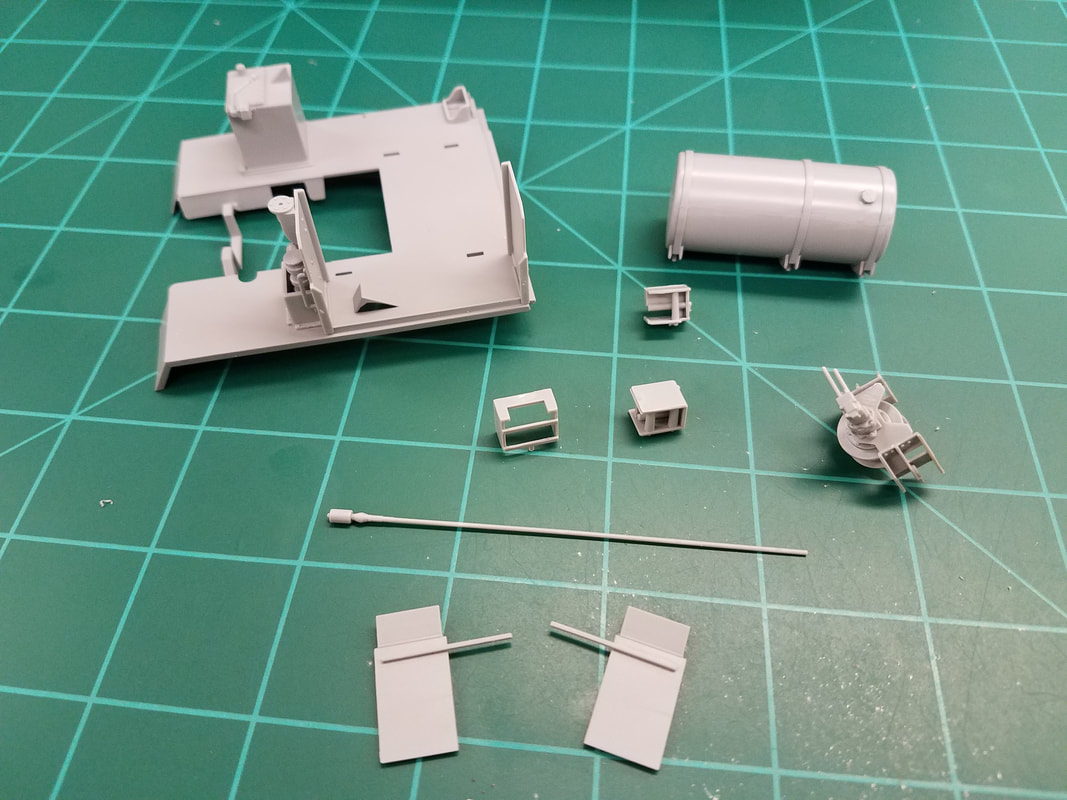
Beginning with Step 20 [7] I'd suggest you build sub-assemblies for separate painting rather than adding them to the chassis. That said, there are some pieces that are better attached now so study the plans and build accordingly. No matter what, this is going to be a bear to paint especially if you go with the three color NATO camo. These are the sub-assemblies in this step [9]. Step 21 [10] add more details. Note you need to make two parts G4/G6, one is shown already attached to the frame. There is no locator for E45 so wait until the parts around it are installed and pick a spot. Step 22 [11] would have you install the engine cover and a box. I will hold off on the cover but attach the box. Step 23 adds the antenna and spare tire. Build them but hold off attaching them. Step 24 [12] is two more sub-assemblies. Here are the loose pieces at this point [13].
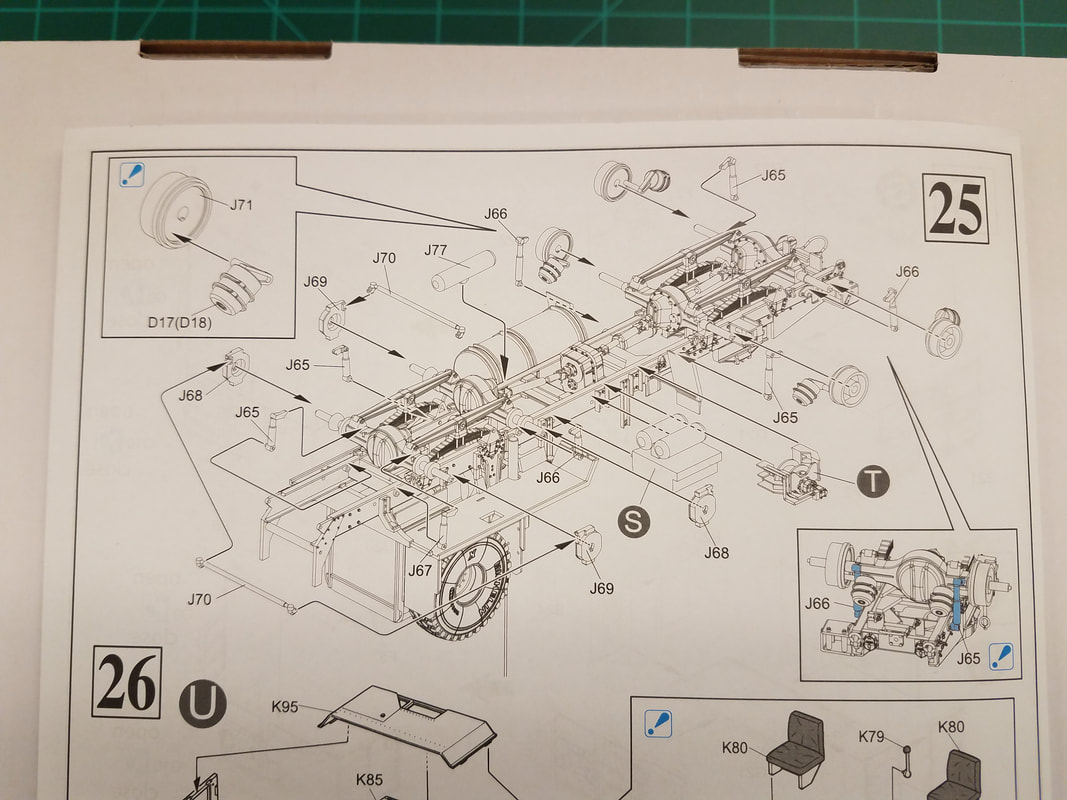
Step 25 [14] completes most of the chassis detail however there are some major issues. The parts D17/D18 have no locator so you have to guess where they mount. But not to worry, they will not even fit because the shock absorbers are hosed too. There are 4 short ones (front) and 4 long ones (rear). Ignore the numbers on the parts and the instructions and find where each one fits. You will find that none fits the left front so just glue that one to the axle and move on. You can't see the top anyway. For the rear, the tab that mates to the axle on the back pair does not fit so trim it off and just glue it in place. Leave the D17/D18 parts off altogether, a shame really.
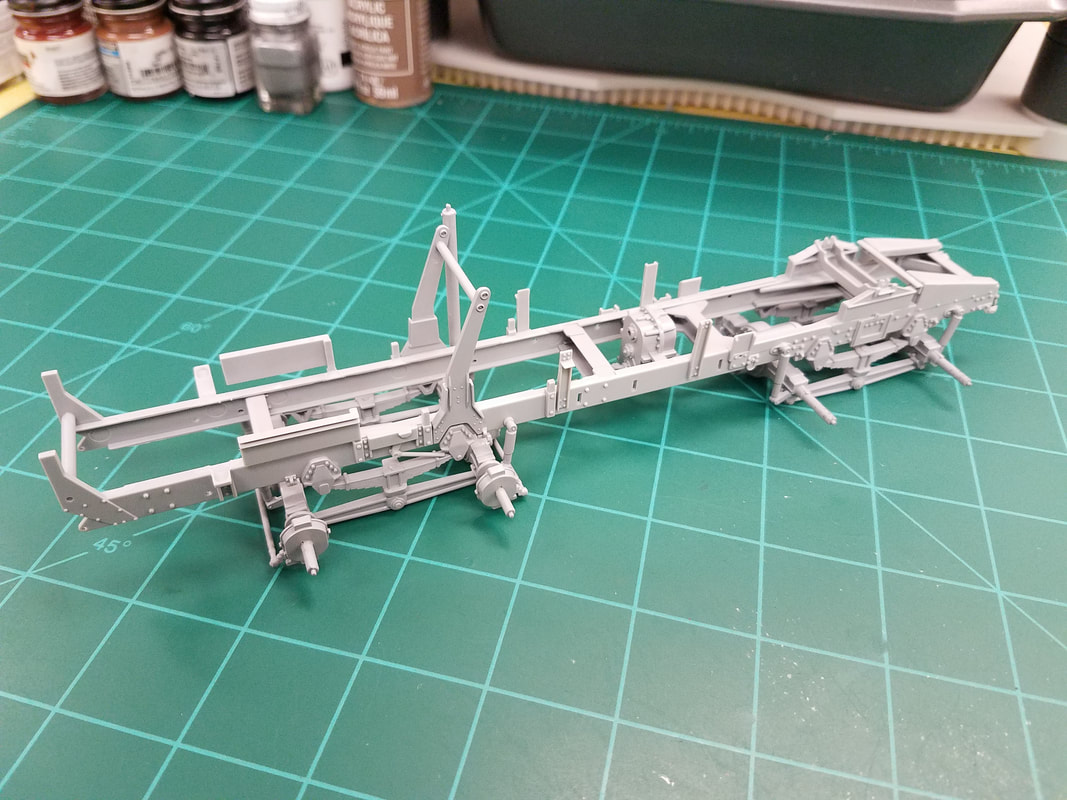
If you haven't been painting as we went along, now might be a good time to do that. There are a few more items that add to the chassis later on but I don't see a way to paint them at that point. Jump ahead, take a look, and decide what you want to do. Your call. Here is what I have at this point [15].
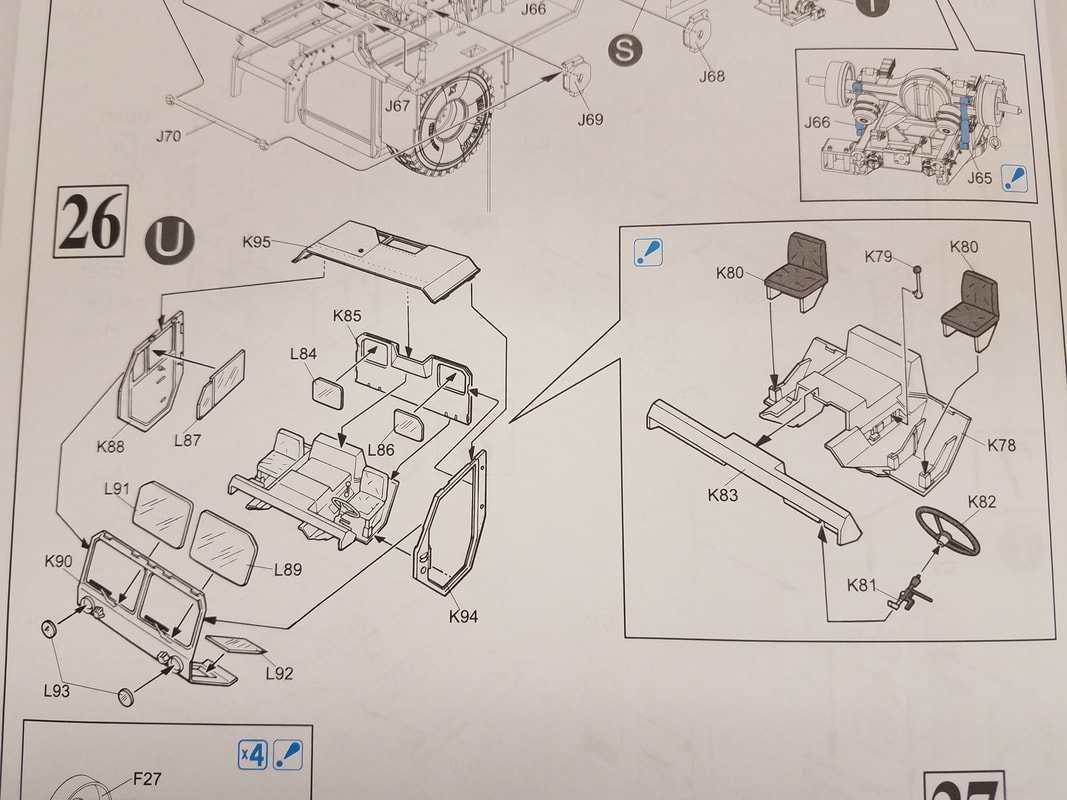
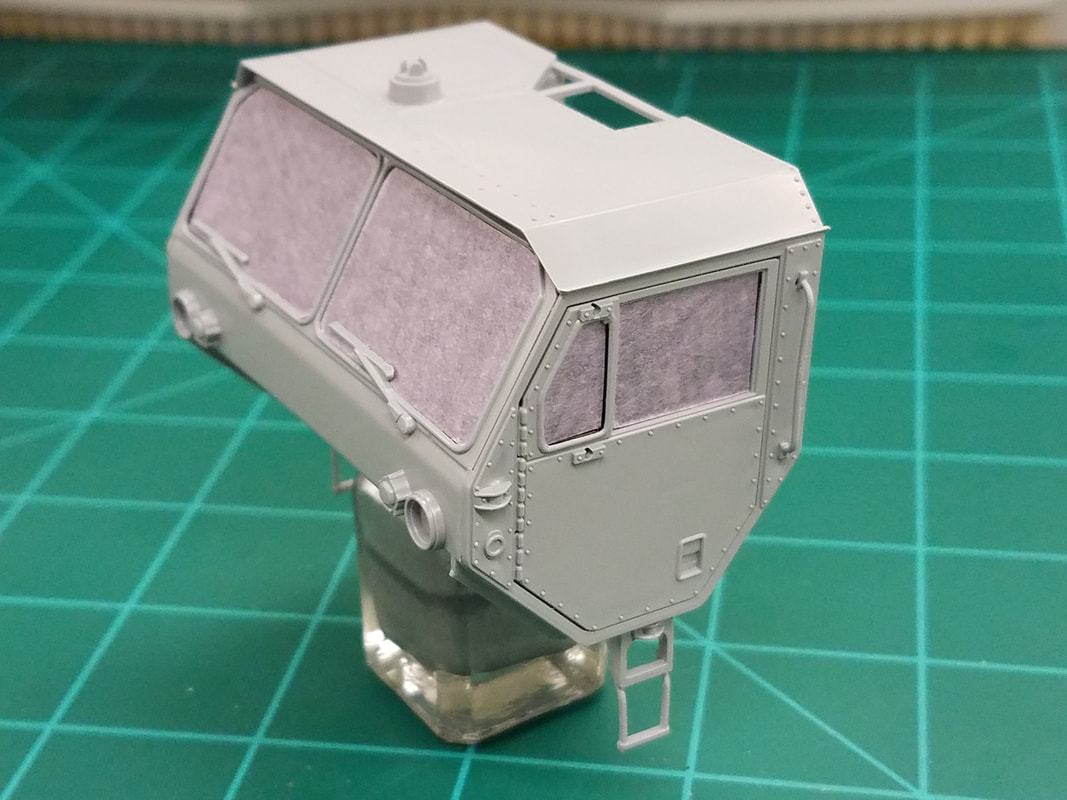
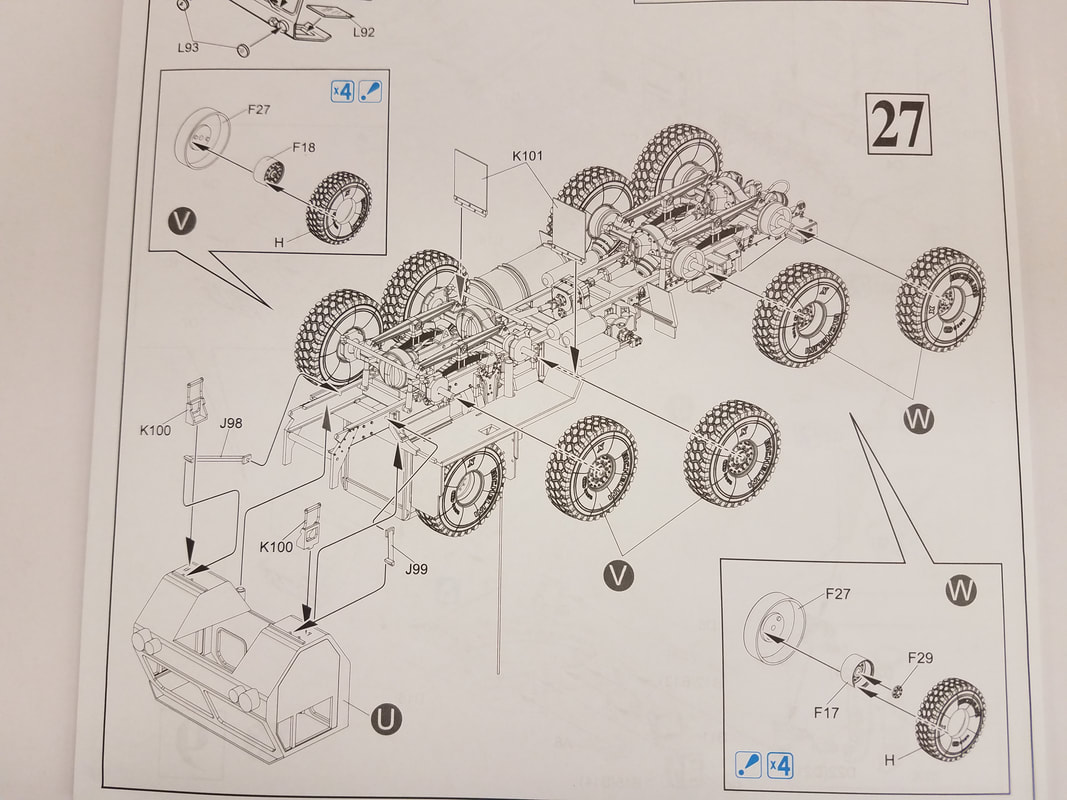
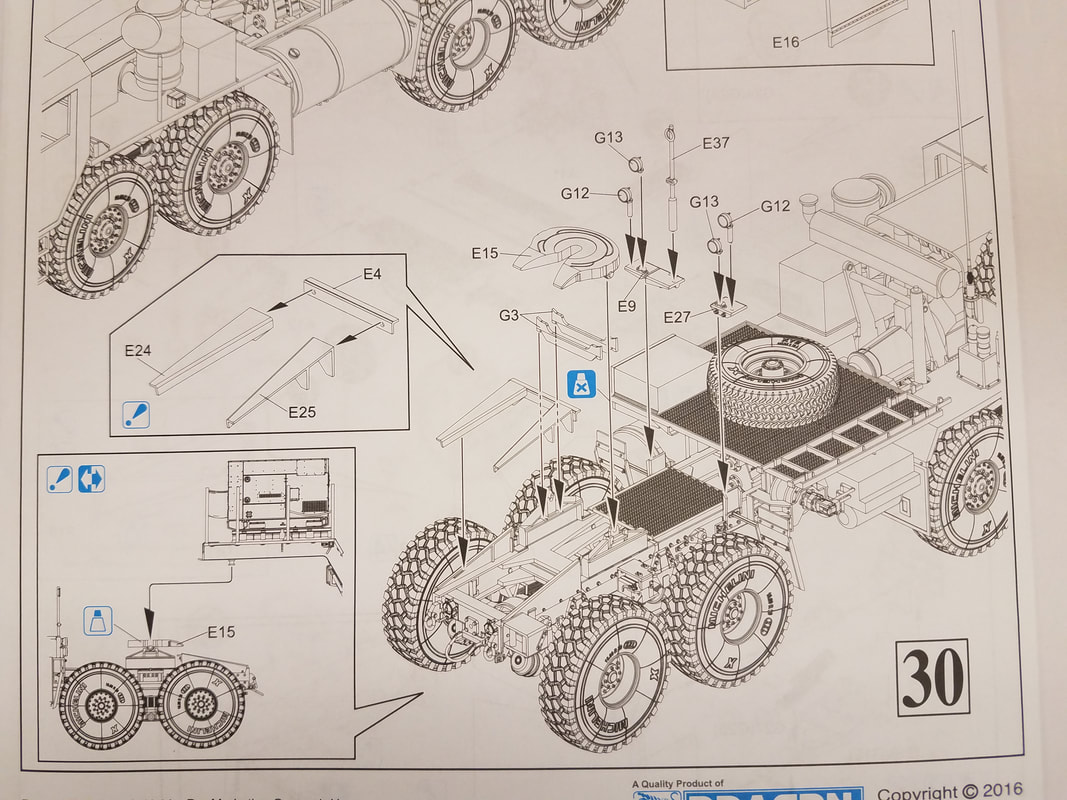
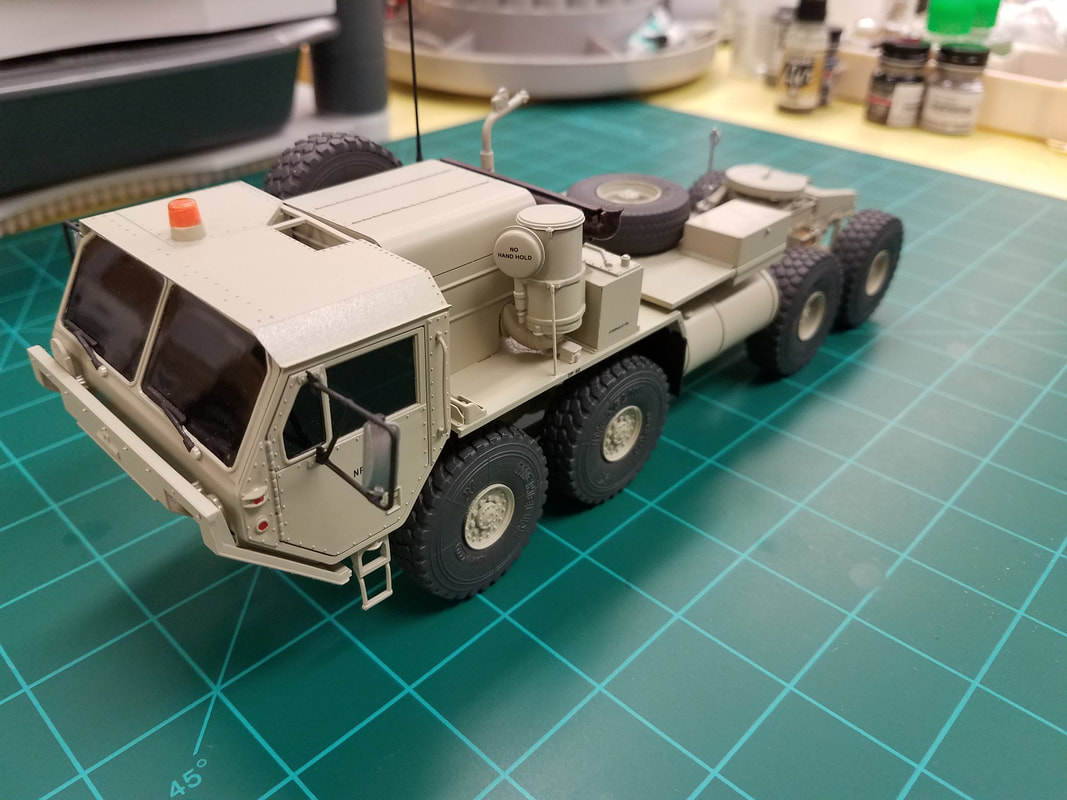
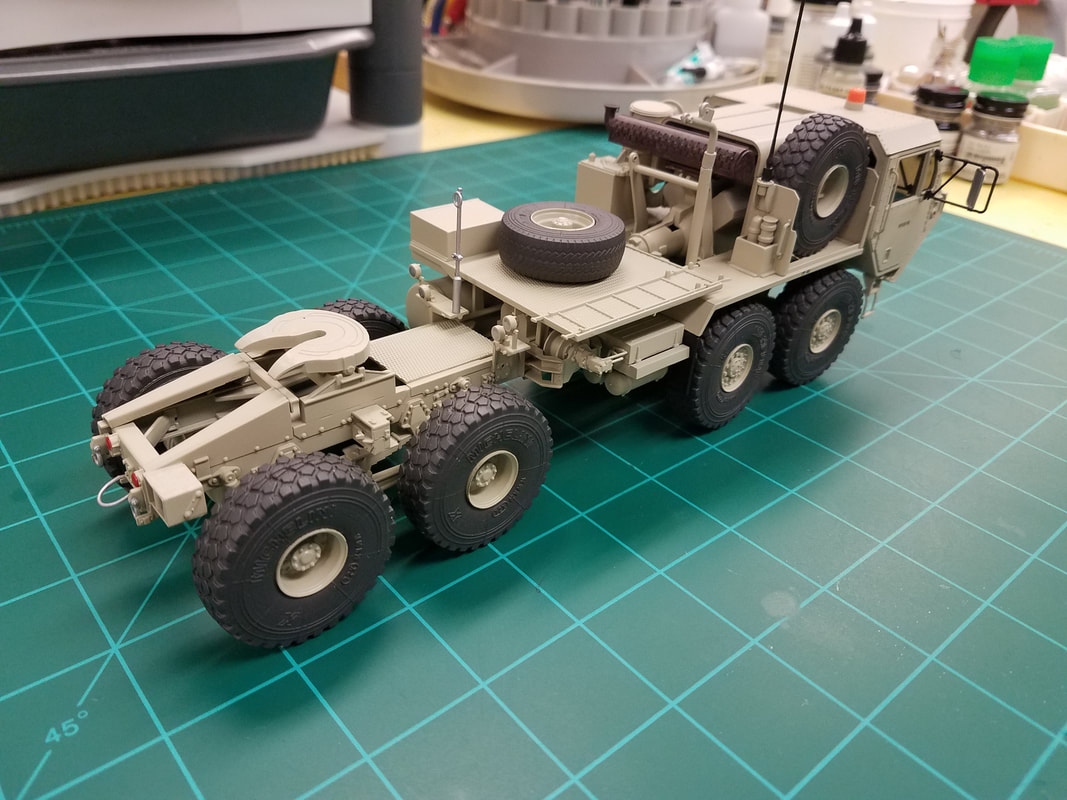
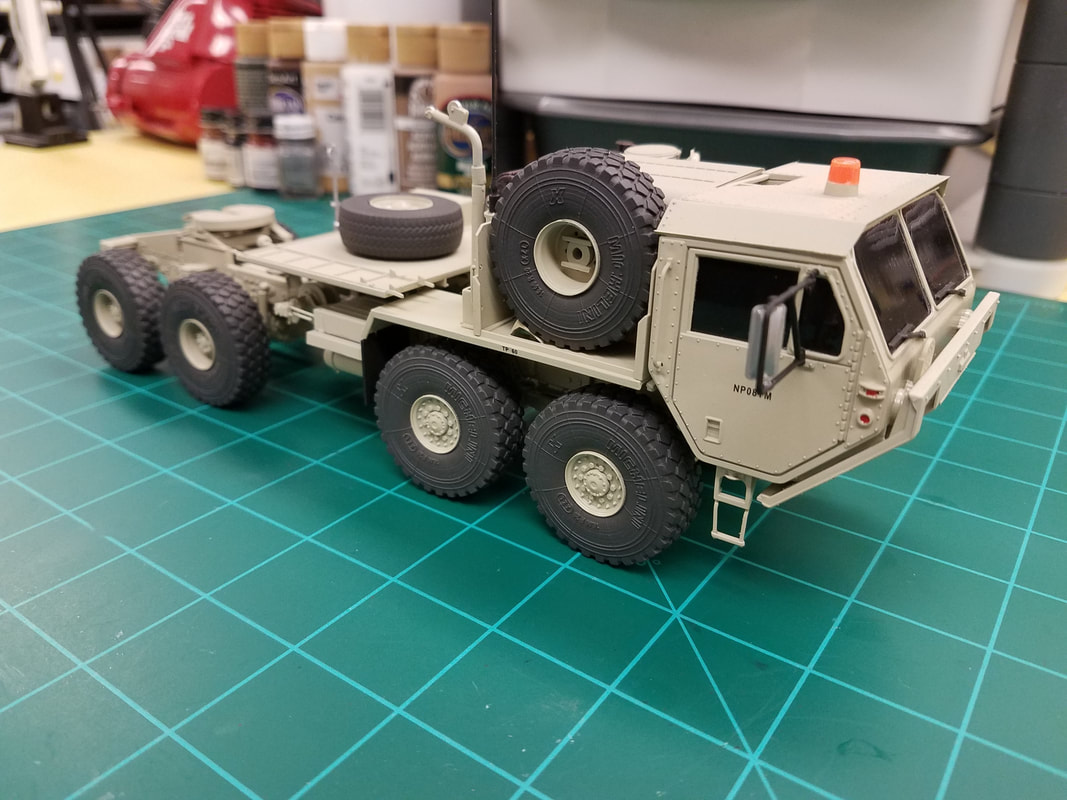
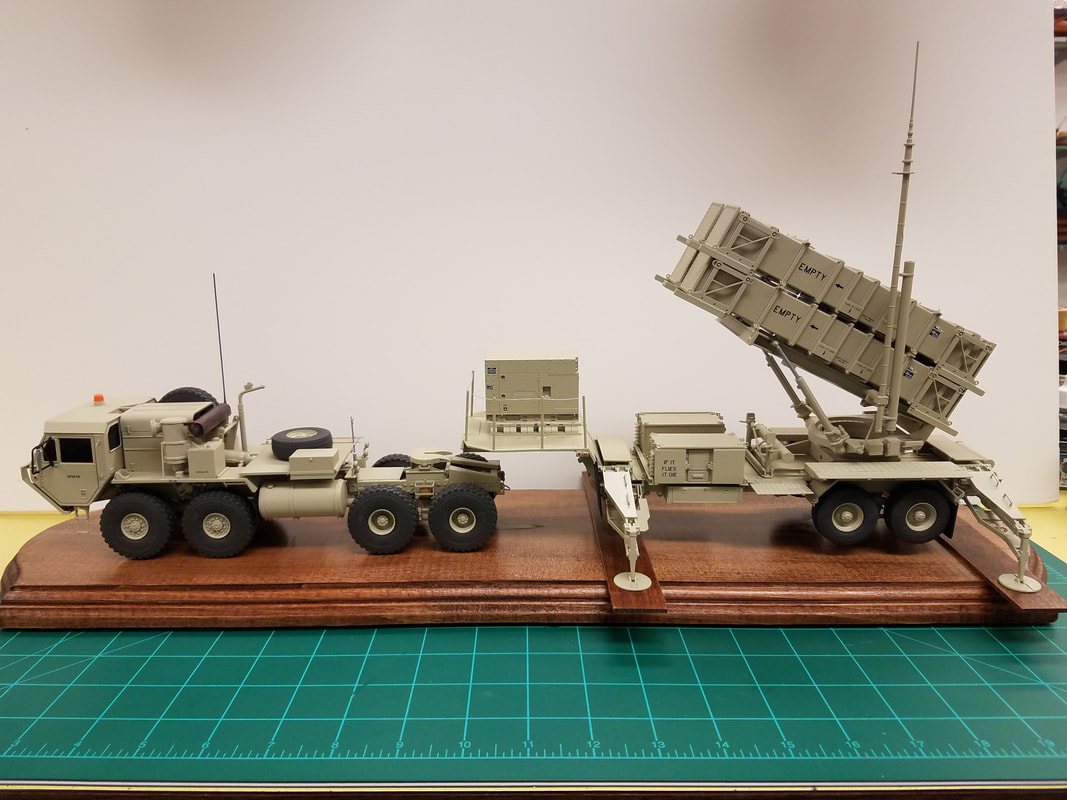
Step 26 [16] starts construction of the cab. Since the interior has little detail and the windows glue from the inside, I chose to forgo the interior and paint the windows flat black on the inside. I'll mask them for exterior painting. Skip to Step 28 [17] for more cab detail before doing anything else [18]. Now in Step 27 [19]we add the tires and cab to the chassis. Steps 29 & 30 [20,21] finish everything up. Add all the miscellaneous pieces we left off previously, do touchup painting, add decals, and dullcote the HEMTT. Here is the completed HEMTT build [22,23,24,25] and the entire model a display base [26].
Overall, the Trumpeter HEMTT kit is far superior to this one. These parts don't fit well, the molds are old and worn, and the instructions are typical Dragon. I can see now why they call it the “Black Death” series. The MIM-104B portion is a bit better since it is all new however it suffers from some of the same issues as the HEMTT. Overall, I would give it a 6 /10. If you think of it as buying two $60 kits, neither one seems worth the price. Now, if you aren't worried about accuracy, want something that looks like a Patriot from about 6' away, and enjoy pain and frustration, maybe this kit is for you. I'm just glad it's over.