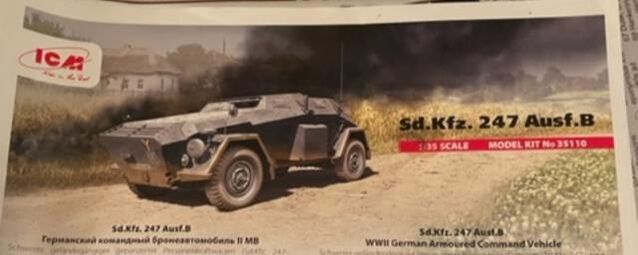
The ICM Sdkfz 247 Ausf B
By Rick Knapp
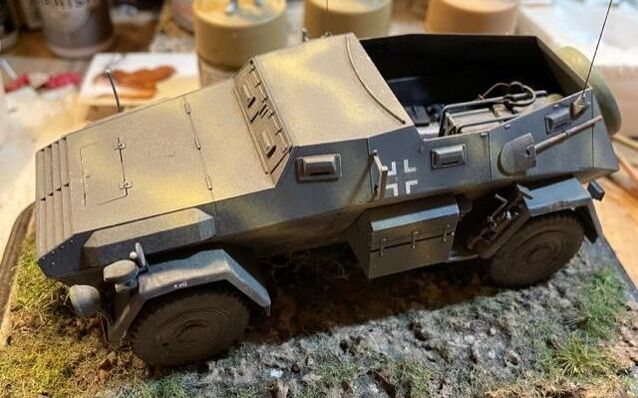
The Sdkfz 247 was an armored command car, built in small numbers and issued primarily to Wehrmacht and SS armored divisions. Some sources describe the vehicle as a mere battlefield taxi, designed to give high-ranking officers armored protection in forward areas. ICM’s kit of the B version of the 247 represents it as a true command vehicle, with elaborate radio equipment, and photographic evidence shows it was used in that way.
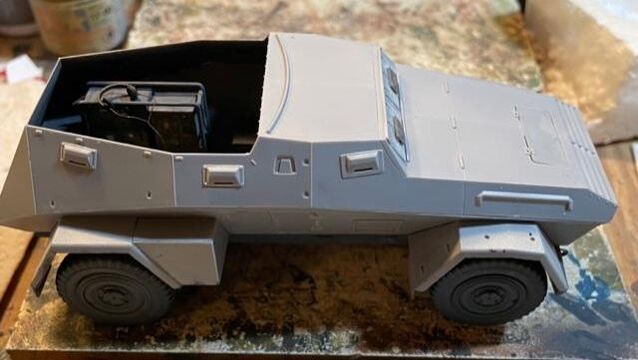
My first impression on inspecting the parts and instructions was that the kit might prove a daunting challenge. It’s an all-plastic offering (except for its vinyl tires), consisting of many parts, some quite delicate. The vehicle’s suspension and internal parts are quite complex. Undaunted, I proceeded with the build.
My first impression on inspecting the parts and instructions was that the kit might prove a daunting challenge. It’s an all-plastic offering (except for its vinyl tires), consisting of many parts, some quite delicate. The vehicle’s suspension and internal parts are quite complex. Undaunted, I proceeded with the build.
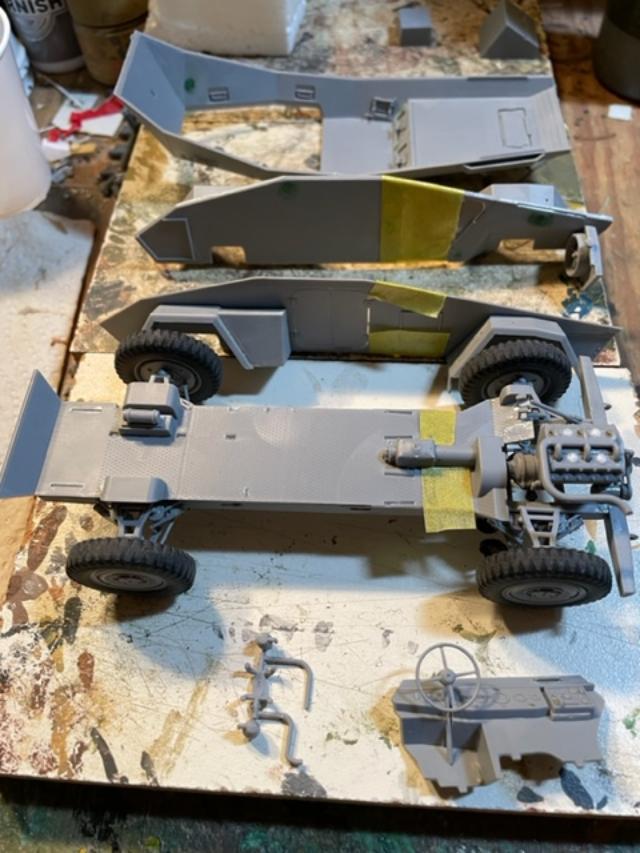
This photo shows the major components of the ICM kit, masked for painting. I decided to join the vehicle floor to the completed suspension before installing the side plates. The kit includes a detailed engine, even though there is no practical way to display it. I included the engine anyway, although building the 247 as a curbside model would have been a great time saver.
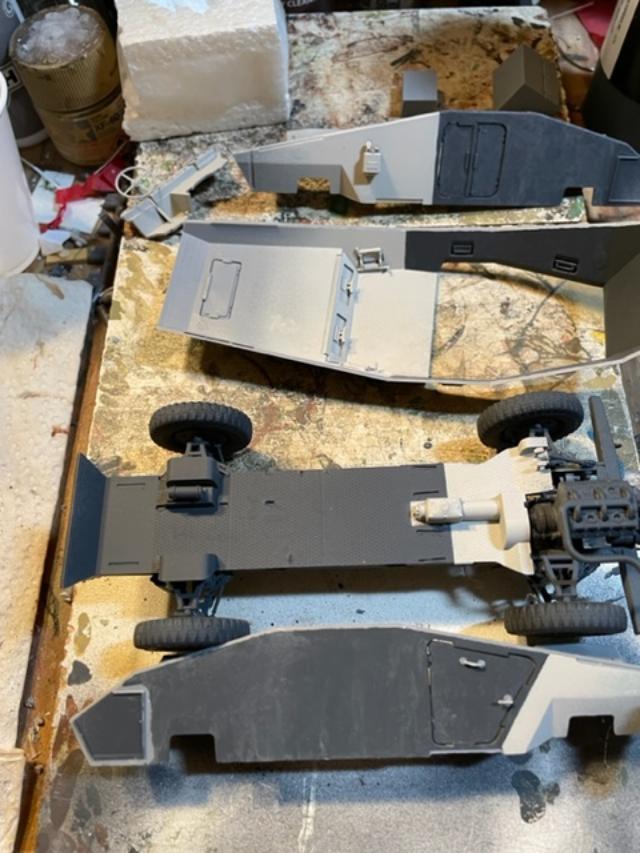
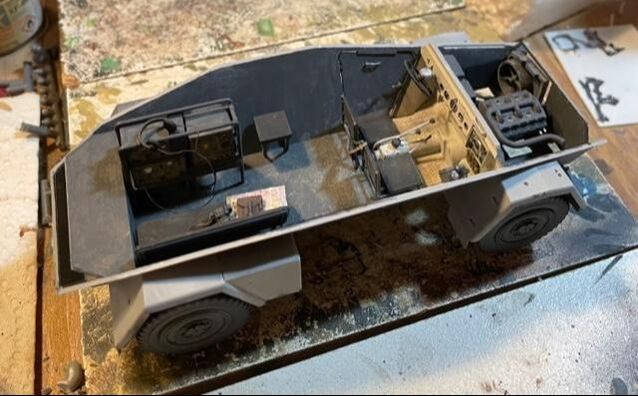
The kit instructions call for painting all interior surfaces white, but I concluded that while the enclosed driver’s position would likely have been finished in the off-white shade used by the Germans, for concealment from arial observation the open-topped portion of the rest of the vehicle would almost certainly have been painted in the exterior color—in this case, dark gray.
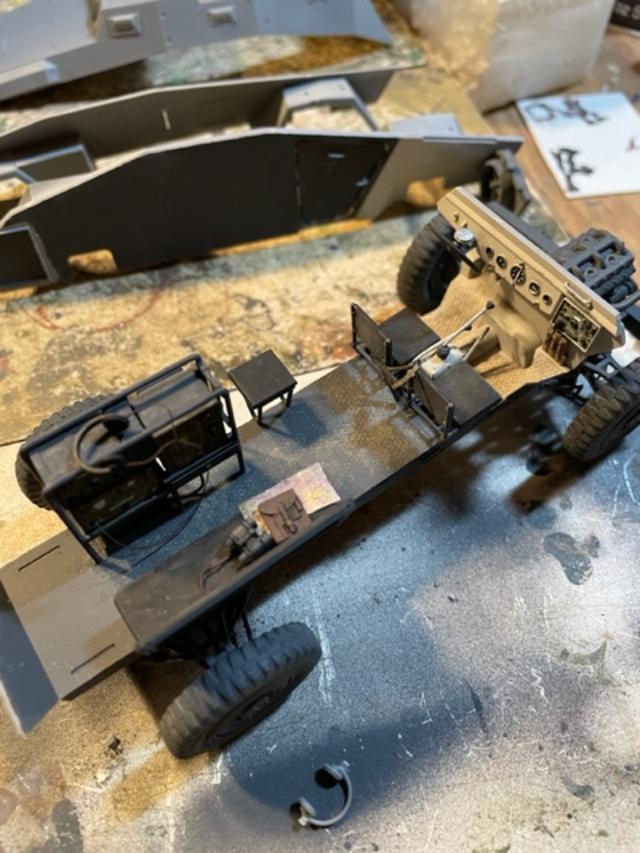
The kit instructions indicate installing interior details after attaching the lower hull sides. I decided it would be more practical to do things as seen here.
The fit of the lower hull sides was excellent, as was the fit of almost everything else in this kit.
I’d rate the fit of the upper to the lower hull as “merely” very good. Some filling and sanding were required there.
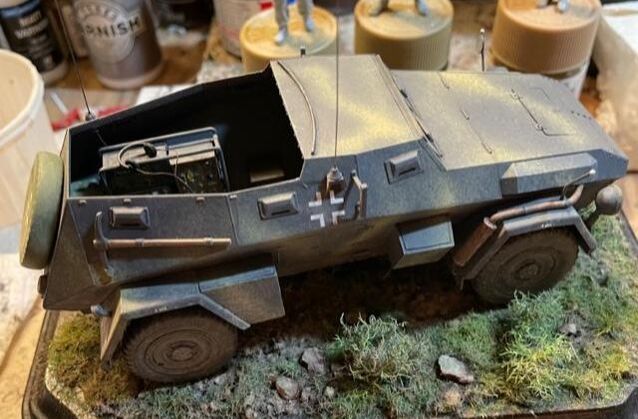
I used ICM’s markings for a vehicle, unit unknown, serving on the Eastern Front. I employed a bit of license in finishing the vehicle as it might have looked in 1943, during the change from dark gray paint jobs to dark yellow base coats. The kit decals proved to be a bit tricky, being hard to move around with a tendency to distort. I managed to successfully apply the tiny decals for the tire pressure markings in three out of four attempts. When marking number four rolled up into a miniscule ball, I decided that its intended location would be a good spot for some fender damage.
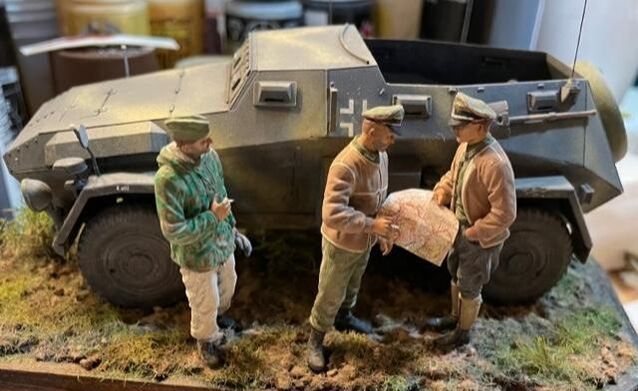
I transferred a trio of Dragon figures from the SS to the Wehrmacht to complete the 247 project.
The ICM 247 armored car is a complex build, but the generally excellent fits make it a project any moderately experienced modeler should have no trouble with. Overall, this is a kit with many “pros,” but there are a few “cons.” Many parts are quite delicate, but thanks to the relative softness of the kit’s styrene, I broke only a couple of them. I did have to create blackout covers for the vehicle’s headlamps; none are included, although they are shown on the box art and in the marking diagrams. The lack of mounts for those headlamps (also shown in box art and instructions) was the only major error I found with the model; I had to scratch build mine. I didn’t mind at all the absence of PE in this kit, but photoetched slats for the engine grillwork would have been a nice touch.
I like this rare little vehicle. With the high parts count and its open top, building and painting took a lot of planning and work, but I think the results were worth it.