|
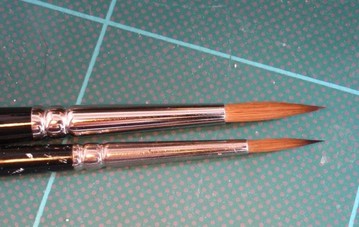
Julien Casses is a fantastic figure painter. He has won 33 Golden Demon awards for his work and is only 27-years-old. Click the picture to link with his Blog site where he has a variety of articles. This article is on the selection and maintenance of paint brushes. It is quick and good reading.
0 Comments
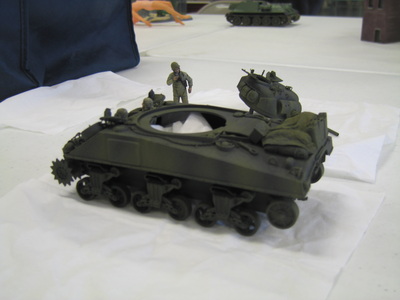
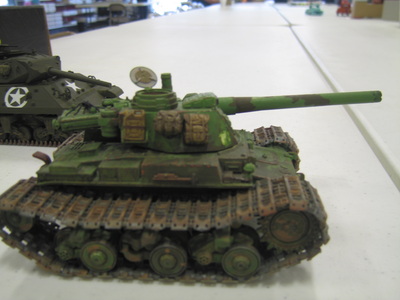
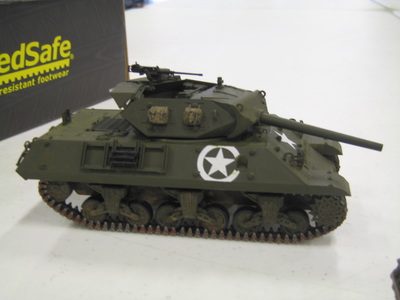
In the Second World War, crews of U.S. M4 Sherman tanks typically loaded the exteriors of their vehicles with all manner of gear—ration boxes, helmets, knapsacks, bedrolls, ammo boxes, fuel cans, etc. A great part of the fun of modeling a Sherman comes from figuring out what extra stowage to pile on and how to realistically secure it.
While selecting items to add to a Tamiya M4, I examined the gas cans provided with the kit. They were not bad, I judged, but there was something missing. These plastic replicas had a “G” for “gasoline” at the top of each half section that made up the body of the can, and one of the halves had “US” inscribed at the bottom of the piece. A bit of research showed that the old, but still good Italeri set of U.S. and German gas cans would yield a more authentic product, so I chose to use them over the Tamiya cans. A completed Italeri U.S. fuel can has “U.S.A.” at the bottom on one side, and “Q.M.C.,” for “Quartermaster Corps” at the bottom of the other side. Whether German or American, gas cans for plastic models are assembled the same way—the body of the can comes in halves that are glued together. This works great for the famed German “jerrycan.” The real item had a prominent seam running around the can’s body from top to bottom. American gas cans were made differently. The top and bottom of the can should be separate, solid pieces; between the top and bottom, the main body of the can is a single piece of sheet steel, wrapped around to join at the can’s long side (away from the filler cap). That’s where the only visible seam on a World War II American gas can should be. The first thing I did after joining the halves of three Italeri U.S. gas cans was to flood their bottoms with gap-filling super glue. By “flooding,” I mean I covered the entire bottom of the can. I set the cans in inverted, upright position to let the glue level and set. Next came filling all seams except for the long side between the cans’ top and bottom with green putty thinned with liquid styrene glue. Once all puttied areas were sanded, I added handles and caps to the cans. I filled any gaps where the handles met the body of the can with thick super glue in order to make a smooth join. Lastly, I used a Dremel tool to add dents to the cans—they weren’t handled gently. The truly anal-retentive will want to add the retaining wire that attached the can’s cap to its handle; I did not. The point of all this is that small things add up. Finding the most accurate gas cans I could locate and doing some simple things to make them look right was an effort that few may ever notice. But when many small corrections and additions accumulate in the construction of a model, the end result can be something that makes knowing viewers look twice. We may never know if anyone but ourselves has derived any satisfaction from improvements we have made to a model. On the other hand, if our model “brings home the gold,” we may not know if those improvements were what brought us victory—but we do know they sure can’t hurt! About DRAW Decal How did we get our Name? My father is a US Army-trained draftsman, and he always signed his drawings with the initials “DRAW.” Since we have to DRAW our decals, and DRAW is also the first four letters of my last name, it seemed to be a natural name for our company. What is the idea behind DRAW Decal? I produce airline decals that normally would not be popular enough to justify mass producing. Each decal is printed as demand warrants, one page at a time on our digital printers. This makes for slow production, but it allows me to individually inspect each decal and to also update the decal sets as the need arises. While these production sets are all currently available, they are only produced (i.e. printed) as they are ordered. I have no large pile of unsold, unpopular decals to contend with this way. Our decals are as close to custom-made as possible. Who creates your art? The art work for our decals is created by a group of artists, with each one contributing sets of their own unique design and preference. Currently, DRAW Decal offers decals designed by: Tim Bradley, Mike Egan, Norm Filer, Mike Jernfors, Jeff Thomsen and yours truly, Greg Drawbaugh. Each set is identified by who designed it unless I was the one who designed it. How do I do that? Our decals are printed in our exclusive Digital Silk process using a large format digital printer that prints white ink. We also print a very few sets using our ALPS printer, only the Ford Trimotor sets and the Hellcat sets. We made the switch to our Digital Silk process to provide what we believe to be among the highest quality decals in the industry. We also want to be able to provide subjects that just would not print well using any other process. Quality and value have always been our driving force, and we continue to push the limits of what our printer and artwork is capable of producing. Do you run out of stock? No, I print decals only as they are ordered. This ensures that the decals are fresh and never out of stock. This also allows me to make corrections and additions to each set as they occur. Once applied, these decals will look just like they were painted on, rather than just “stickers” applied over a paint job. Remember, the art of decaling is making it look like you did not use any decals! |
Archives
February 2017
|
