|
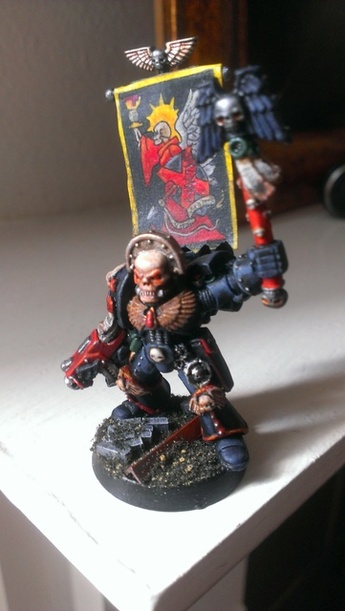
Lester Plaskitt, in the forward to Michael Rinaldi’s Tankart Volume 2, discusses the three most important words that have guided him in the construction and painting of scale models: aspiration, inspiration, and knowledge. I have added harmony to the list as an important word for me. According to Dictionary.com the definitions of these words are as follows: Aspiration - strong desire, longing, or aim. Inspiration - an inspiring or animating action or influence. Knowledge - acquaintance with facts, truths, or principles, as from study or investigation. Harmony - agreement; accord; harmonious relations; a consistent, orderly, or pleasing arrangement of parts; congruity. Aspiration: Mr. Plaskitt identifies other modelers as a source of his aspiration. We are very blessed in CASM to have a large number of accomplished modelers who bring their work to CASM meetings and post on the CASM Forum. They are a source of aspiration for me and constantly show me where I can improve in my modeling skills. I have also found excellent models at the Tulsa Figure Show, Wonderfest, and our own Sproo-Doo contests. I have often found myself looking at models and wondering “How did they do that?” This always calls for a closer inspection of the model and finding the modeler who created the piece to ask a thousand questions. Publications are another source of aspiration such as modeling websites, magazines, and the excellent books published by Mr. Rinaldi. I also draw aspiration from modelers that are new or re-entering the modeling hobby. I enjoy watching their growth in modeling skills and aspire to grow along with them. Inspiration: Mr. Plaskitt cites as a source for inspiration pictures of actual the actual subjects of his models. Publications or the internet that depict the subject matter in real life situations provides for him context and scenarios where the subject flourished or met its untimely demise. Since I build fantasy and Anime models, I would add to the list of publications artwork completed by masters of fantasy depiction, such as Boris Vallejo, Julie Vargas, and Luis Rojo, and cinema. This work often provides inspiration for bases that provide context to a piece as well as influence on the colors selected for painting. Knowledge: Modelers are consummate historians who often seek as much knowledge about their selected subject matter as is possible. The amount of information a modeler has related to their modeling subject is phenomenal related to how something was constructed, the color and aging characteristics of paint and material, and the environment in which the subject existed. Figure modelers research the historical nature of a subject as well but also the textures of clothing, color of skin, the nature of jewels, and the color of precious metals as they reflect the items around them. Figure modelers also invest in instruction on art technique, relationships of color, and the characteristics of different kinds of paint. It is knowledge that lets us know if the completed subject “looks” right. Harmony: When I first starting modeling as an adult I was content with insuring the modeled piece was painted the correct colors. You know what I am talking about: the inside of some cockpits were chromate green; Sherman tanks were olive green; and some uniforms were khaki. I saw color as being, well, one color. What it was is was what it was. And, when I was finished I was well-pleased with a clean looking model, but the different elements of the model did not standout and were difficult to see. As I started competing in contests I found the “clean” look did not stand out when sat next to other models where all of the parts could be clearly seen. Panel lines were darker, edges of panels were lighter, tops of ridges on clothing were lighter and inside of wrinkles were darker. The contrast between colors became important. But what color is the correct color when creating the contrasts? Why was it that some models looked pretty good and some models looked harsh and discordant? The differentiating issue was color harmony. As I further plunged down the rabbit’s hole of figure painting I slowly came to an increasing understanding of color harmony and how color harmony allowed me to emphasize specific elements of the piece I was rendering. It is often not enough to paint parts the correct color. A better outcome occurs when the correct colors are influenced so the collective parts of the piece are not only correct but are also in harmony with one another. This next step often distinguishes the difference between a great model and an excellent model. As an industry, modeling is lucky to have attracted the attention of professional artists who have taken that next step and written information on how to render accurately and in harmony. This step is not for everyone but it certainly has been a source of aspiration and inspiration for me. This last word I did not include on the list but I believe is a necessary quality of a modeler is courage. It takes courage to aspire and grow in modeling. Growing necessarily requires initial steps of failure with a faith that taking the necessary steps, with practice, results in an ever improving quality of workmanship and painting. As such, I rejoice in the effort by those modelers who have the courage to take steps into a new, for them, technique that eventually improves their final piece. I personally find it stimulating and astonishing that over the last six years since I have re-entered the hobby, every model I have built has incorporated some new technique. It seems there is always a new technique to try. While this often leads to mistakes it has also led to a steady progression of improvement. It is sometimes daunting to learn something new for every model and it often slows down the painting process as I try to think and understand the new way of rendering my model. Sometimes it has led to a creative paralysis that has caused gaps in my building and finishing process. Okay, it sometimes has made me down right mad. But in the end each new creative step has led to a better model than the previous model. Learning new ways is a way that keeps the hobby fresh for me. While I do not advocate this method for everyone, for me, it has been a necessity to hold my attention and provide countless hours of enjoyment. What greater joy can there be than finding an area of interest in which you are surrounded by so many people who can serve as an inspiration for growth; where the subject matter can inspire creative activity; where an ever-increasing knowledge of a subject can be gained, the manipulation of color harmoniously can increase the quality of a piece; and courage can be strengthened? All of which can be shared with like-minded people!  Nominations for Member of the Year will be taken at the 7/13/13 meeting. The Member of the Year is a person who has contributed to the club over the course of the year through service. Contributions may include representing the club to other organizations by contributing models to the organization or regularly attending seminars/ classes; planning and working during the club contest; being supportive of other club members in their modeling interests; writing articles to the Scratching Post; conducting demonstrations at club meetings; regularly posting projects or comments on the club Forum; or participating in numerous contests and promoting CASM to name a few examples. You know who the Member of the Year is. They are a person who is dedicated to helping CASM succeed and promoting the modeling hobby. They are not necessarily the person who is out in front. Quite often they are the person who regularly shows up and helps where help is needed. They enjoy the modeling hobby, help others improve their modeling, or makes themself available to talk about models. A Member of the Year does not have to build the best models, or even build models at all; nor do they need to be a club officer. The E-Board would like the nomination to be in the form of a short written narrative that describes why you think your nomination ought to be the Member of the Year. The narrative is important because it tells other club members why you believe your nomination deserves to be the Member of the Year. Nominations will be taken at the July, 2013 club meeting; voting is conducted during the August, 2013 club meeting; and the Member of the Year is announced at the September, 2013 club meeting. Nominations and voting may also occur via the internet by sending your nomination and/or vote to Brent at the above address. It is a great honor to be nominated for Member of the Year so please carefully consider who you would like to nominate. Scale Modelling World is a great website you should check out. The website is operated by Lloyd King, Ray Massie, Michelle “Mish” Edwards, and Mike MCEllaney. Lloyd, Mish, and Mike are members of our club and Michelle and Mike are located in England. They desired to create a website where modelers could receive good constructive criticism with the purpose of improving their modeling skills. To accomplish their aim, they have set up a forum where modelers submit their work for honest feedback and suggestions on how they can improve on their work. In addition, they offer one-to-one service over Skype where they can dialogue with modelers about their models and different methods that can be used to improve the quality of their final product. Other Forums exist that are common to other websites like “Work in Progress” and a “Finished Models.” Lloyd, Ray, Mish and Mike are very accomplished modelers and have a wealth of information to share with anyone who desires to improve. Otherwise, The website is supportive of modelers of all skill levels and there is an “air” of rejoicing all models posted on their site. What follows is a brief biography of each: 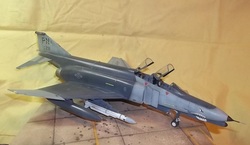 Lloyd King, Llking on the forum: Lloyd is 51 years old and belongs to Central Arkansas Scale Modelers and has served as an IPMS National Judge. Having built his first kit when he was 9, Lloyd says he enjoys modeling "because of the research and what it can lead to". He likes to build all types of aircraft from WWI to modern jets and helicopters. Lloyd has a reputation for building models at lightning speed, and it's often joked that his finished models appear on the forum before the paint is dried. Lloyd is adept in finishing models and runs tutorials in finishing and weathering. Ray Massie, RAVEN on the forum. Ray is 48 years old and has been building models on and off for 30 years. Ray's first model was "The Hindenburg". Ray feels a sense of achievement from building and finishing a model. He enjoys building aircraft from WW2 because every plane has its own story. 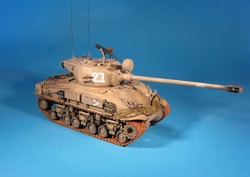 Michelle (Mish) Edwards, Big Bird on the forum: Mish built her first model, an Airfix Spitfire, with her Dad's help when she was five years old. She has had a couple of breaks from the hobby over the years but returned and made modeling her main hobby in 2007. Mish likes to build WW2 aircraft and armor but has a special liking for F-16s. Mish is one of the sites resident 'techies'. 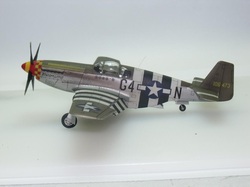 Mike MCEllaney, Rivet Counter on the forum: Mike has built everything from boats, ships, cars, armor, but now mainly builds WW2 aircraft. Mike has a passion for extensively researching the subjects he builds and is always willing to help out fellow modelers in their research. He has an eye for detail and for this reason is often fondly referred to as 'Microscope McEllaney" by his friends. I have included a picture of their work next to their names so you can see the quality of their work. For those of us that work with plastic, resin, photo-etch metal, acetate, vinyl or white metal the idea of, “keeping it all together,” means something very different from what it means to most folks. That remark goes back to a question we have all had to ask before – “Superglue, Gap-filling CA, liquid cement, tube glue, Gator Glue, epoxy, which glue do I need to use for this?” We have all had to ask that question before, of ourselves or of a friend or fellow modeler with more experience. Oh, we all have our own favorite kind of glue, but that does not mean that favorite is the right one for the job at hand. If you are attaching a canopy to a model plane, for example, then you do not want to reach for the CA (Superglue) or liquid cement. Both of these glues will result in a capillary action that will ruin the clear plastic of the canopy. If you are working on a 90mm metal figure, for another example, then reach for the epoxy. CA is good for tacking the arm or head in place, but it is not going to be strong enough to keep them in place – epoxy is. This Musing will deal with the various types of glue available to modelers, explaining their characteristics, advantages and disadvantages. One very important factor to remember is that the vast majority of model glues and cements contain toxic chemicals, such as Methyl Ethyl Ketone (MEK or butanone) or cyanide, as a major component of their makeup. These chemicals can result in fumes as the glues cure that can be dangerous, or even poisonous, and flammable if not used in well-ventilated areas. In the early days of the hobby, one type of glue was used almost universally, thick polystyrene cement in a tube. Today, because high quality scale models are no longer made simply of styrene plastic, numerous types of glue may be required. Today scale models may include polyurethane resin; various metals; rubber and/or soft vinyl. Getting the right glue for the job is very important, so modelers need to know what is available and on what they work best. The main types of glue that a modeler will need in their armory are:
Use minimum amounts only and do not use it on a model where it will take a long time to dry. Polystyrene cement works by dissolving or softening plastic with MEK to form a bond as the glue dries. This type of glue is only suitable for rigid polystyrene plastic, the type used for injection-molded kits. In effect, the two pieces of plastic are welded together, so a very good bond is formed that is as strong as the plastic. The drying time varies depending upon how much glue you apply and how thick the glue is. The thinner the cement used the faster the drying time. Thin liquid formulas will normally dry in seconds, but the very thick tube glue may take a few hours. It is important to remember that even after a bond forms between two pieces of plastic the plastic may not have fully re-hardened so handle the bond carefully. The major disadvantage of poly cement is that if you use too much it may completely dissolve the material you are gluing and damage it. In addition, if you drop or smear any glue on the surface of the model it will damage any surface detail. For this reason, you must use care and use the minimum amount of glue. Furthermore, do not place glue into holes and cavities unexposed to the air, because it will not be able to dry and will slowly dissolve the surrounding plastic. CAUTION - Before proceeding with a discussion of the glues, I would like to provide you with some information on MEK. Methyl ethyl Ketone, also known as 2-Butanone, is a colorless liquid solvent with an acetone-like odor. It is volatile and potentially explosive. Its main uses are in the manufacture of a number of resins, waxes, and coatings, as well as a general industrial solvent for nitrocellulose coating, vinyl film, and smokeless powder manufacture. US chemical companies produce more than 500 million pounds of it each year, and exposing probably more than three million workers to it annually. MEK exposure can cause, but is not limited to, the following symptoms: · Irritation of the nose and throat (begins at 100 ppm) · Eye irritation (start at 200 ppm) · Dermatitis of the face (Begins at from 300 ppm to 600 ppm) Narcosis can occur (at elevated concentrations).  Thick Tube Cement When scale modeling first became popular, modelers used this almost exclusively. It comes in metal tubes similar to toothpaste and is quite thick. The thickness of the glue means that you should use it sparingly to avoid damaging the model. Some brands also have a tendency to be ‘stringy’ and leave a thin thread of glue behind which can be annoying. Although tube cement has lost popularity over the years, it does still have its uses. It is easy to apply a very small drop precisely where you need it and the slow drying time gives the modeler plenty of time to position the parts correctly. Medium viscous cement This normally comes in plastic bottles that have a long thin hollow tube to apply the glue. It is more user-friendly than the thick glue, being less likely to dissolve away the glued part. It also dries much faster than the tube cement, while still giving you time to position the parts. Ultra-thin or liquid poly cement This type of glue normally comes in small glass bottles with a brush applicator, or you can use an old small paintbrush. The glue does not stick the paintbrush bristles together even when the cement dries on them. The bristles may become stiff, but you can easily soften them by rubbing them gently. One thing to be aware of when using liquid poly cements is that they are not all the same. While this type of glue always looks the same, the amount of solvent in it varies from one manufacturer to another, resulting in one being “hotter” than another manufacturer’s. This makes it important when using cement from a manufacturer you are not familiar with that you first test the glue on some scrap plastic or sprue to determine how strong it is and how quickly it dries.  One of the hottest and strongest liquid cements is Plastruct Plastic Weld. This cement is works on ABS Plastic, which contains more rubber content than regular polystyrene and thus is more flexible and shinier than the plastic used for scale models. Uses for ABS plastic include vacu-forming RC parts, the manufacture of toys (including Lego), auto parts and household items due to its increased flexibility, resiliency and somewhat higher melting temperature. You can use Plastic Weld to glue polystyrene but you should use it sparingly to avoid damage to thin parts and surface detail.  Probably the first liquid cement most of us ever tried was the good old stand-by from Testors. The fast drying time of this type of glue means that it is very unlikely to damage parts unless you accidentally drop some on a visible surface. One disadvantage with this glue is that there is only a very limited time to assemble the parts after applying it. There must also be a good contact between the joint surfaces as this is definitely not a gap-filler. 2. Cyanoacrylate Adhesive (‘Superglue’ or CA) Originally developed to bond surgical incisions in the 1940s, this type of glue bonds human skin almost instantly and can cause permanent damage to the eyes. Cyanoacrylate glue hardens very quickly when trapped between two surfaces. Condensed water vapor on the surfaces (namely the hydroxyl ions in water) causes this reaction. The water comes from the surrounding air, so obviously the air humidity is a factor that may affect bonding capabilities, or cause them to differ from application to application. Cyanoacrylate molecules start linking up when they contact water, as they link up they whip around in chains to form a durable plastic mesh. The glue thickens and hardens, starting at the outer edge, until the thrashing molecular strands can no longer move. Because the curing reaction moves from the surface and outer edges of the glue, thick seams or large blobs of glue may harden less satisfactorily than surface-to-surface bonds with good fit. In a thick blob of glue, the curing reaction may stop before it reaches the center of the blob. Generally, you should avoid any seams thicker than 0.25 mm. Thick seams will also take longer time to cure. When first introduced, advertisements claimed CA glue was capable of instantly bonding almost anything to anything else. While CA glues are very versatile, there are certain materials that regular super glue does not bond, including wood, leather and vinyl. Special formula CA glues are available that does bond these materials. Regular CA is very good for bonding hard plastics, resin and metals to each other, which makes it very useful on multi-media kits. However, it is not easy to use and novices and children should avoid its use. Because of the fast setting time of CA glue, it can be unforgiving. Thin formula CA cures in only a very few seconds and very often is more successful at gluing your fingers to the kit much better than the kit parts. Unlike polystyrene cements, which dry from their exposure to air, CA glues dry because of the absence of air. Although CA will stick most things together, the quality of the surface is far more important than when using polystyrene cement. Any dust, oil or grease on the surface will substantially reduce the strength of the bond. Rough surfaces stick better than smooth ones, so a light sanding of the surfaces that are to be bonded is worth considering. If CA accidentally gets on the wrong surface, immediately wipe off the excess with a paper towel. Leave any residue to harden and then scrape it off with a sharp knife. If your fingers or other human tissue is accidentally bonded, carefully separate the bonded skin using superglue debonder or acetone (fingernail polish remover), which should always be available when CA adhesives are being used. Only a small fraction of the CA adhesive purchased is actually used. This is because once open, it deteriorates quickly and it very easily blocks the nozzle of the bottle, which often makes it impossible to get at the remaining contents. To reduce this problem, always wipe the end of the nozzle, gently tap the bottle on a hard surface to encourage any glue on the inside of the nozzle to go back down and put the top back on straight away. If you are not going to use a bottle of superglue for some time, placing the bottle in the refrigerator extends the shelf life. CAUTION – The use of superglue comes with its own set of health hazards. The fumes from CA glues will cloud clear plastic parts – do not use to attach windscreens and cockpit canopies, etc. Special glues are available for this purpose (see section 4, Clear ‘Canopy’ Glues). The glue has a distinctive, strong, acidic odor. Because the fumes from curing superglues contain cyanide, breathing them is irritating for your nose, throat, bronchial tubes and lungs. For some individuals, repeated or extended exposure to fumes may prompt chronic allergic reaction. In dry air (less than 50% humidity), fumes may be also be irritating to eyes, stimulating tears. In contact with the skin, the primary risk with the CA is bonding fingers or other body parts together, or to model parts. This goes also for eyelids. While skin or eye contact with CA is non-toxic, it may still be necessary to seek medical help if the body parts are bonded. Never try to tear apart the bonded body parts! CA cannot trigger allergic reactions through skin contact. The wisdom of the above is that you should use safety glasses and breathing masks when working with these glues. A well-ventilated area is also necessary. Like poly cement, CA glues come in three viscosities, from ultra-thin to thick (also known as gap-filling superglue). Thick (Gap-filling) CA Where two parts do not meet closely using gap-filling superglue bonds the two pieces and fills the gap. However, it is not the ideal filler. Applying the right amount of glue to fill the gap can be difficult to do without leaving a depression or having some ooze out on the model. It is also difficult to work it to the correct shape when it is drying and to sand it smooth once dry. Only a short time exists between the glue becoming firm, when you can sand it, and when it becomes too hard to sand. Thick superglue takes a long time to cure, but it is possible to buy an activator spray, i.e. Zap-A-Gap, that hardens it almost instantly, or you can add Micro Balloons or baking soda to speed up the curing time and improve the strength of the bond. Medium CA This is probably the easiest viscosity CA to use. When using CA for applying PE parts this is normally the glue you should use because unlike the ultra-thin variety, it will not run everywhere and it normally has about the right drying time. When you buy superglue from a hardware store for domestic use, it will probably be medium viscosity. Ultra-thin CA You should be careful when using this type of CA. Unlike ultra-thin poly cement, you cannot apply it with a normal brush because it would ruin a brush with each application. Sometimes, it will come with a special applicator consisting of a thin plastic tube, but applying the right amount without it running everywhere can be difficult. Some thin superglue come in a bottle with a brush and these may be the easiest to apply. The advantage of the ultra-thin superglue is that parts can be assembled ‘dry’ and then the adhesive is applied to flow along the edges where it is sucked in by capillary action. It bonds very fast – sometimes in only one or two seconds. 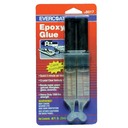 Epoxy glues are a two-part adhesive consisting of – the hardener, or catalyst, and an adhesive – which require thorough mixing of even parts before application. Epoxy adhesives may come in separate tubes or in a double syringe. Using the double syringe packaging ensures you use equal parts of hardener and adhesive, which is critical for the strength of the bond. Like superglue, you can use epoxy to glue almost anything to anything, but they also need clean, grease free, and preferably, roughened surface to provide the best bond. You can purchase epoxy glues and putties with setting times varying from 5 minutes to 24 hours. It is useful to keep both quick and slow setting varieties around. While the slow drying varieties theoretically produce a stronger bond, this is not as important in scale modeling as even the quickest setting varieties produce a very strong bond. Because of the slow drying time, it is normally necessary to support the parts you are gluing until the adhesive begins to harden. If you squeeze excess glue out, leave it until it begins to harden, then you can cut it away cleanly. Attempting to wipe it away immediately will invariably result in a messy smear. Epoxy glues are great when you need to create a very strong bond, especially between two different materials, for attaching heavy resin parts or working with white metal figures. Epoxy is not commonly the glue of choice for most modelers because it: · requires mixing · is easy to mix far more than you need · tends to be messy. Still, you will usually find a double syringe of it in the bottom of every modeler’s toolbox. 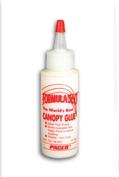 4. Clear ‘Canopy’ Glues Gluing clear plastic parts presents special problems. The fumes given off by polystyrene cements and even CA glues can make the clear parts become foggy. It is very difficult to use epoxy resin glues on clear parts without smearing the glue on the parts. ‘Canopy’ glues are glues specifically designed for use on clear plastic parts. They appear to be very similar to the clear adhesives described in the next section, but tend to be less viscous and so it is easier to apply them in small amounts. Not only do they not affect the clear parts but also by drying completely clear any excess is almost invisible. Note however, that the bond is not as strong as some of the glues previously discussed, but it is normally quite adequate. In addition to using these as glue, you can use some brands to create a membrane to form windows across small gaps such as in models of airliners. Once dry you can shape it, due to being water-soluble, by lightly moistening a paper towel and rubbing until you obtain the desired shape.  5. Gloss Varnish It may be surprising to find gloss varnish in a list of adhesives because it is not glue at all. However, gloss varnish is surprisingly useful for holding very small parts, such as photo-etch buckles in place. Johnson’s Future/Klear Floor Wax is one of the more common names dropped by modelers when discussing gloss varnish. It works very well because it becomes tacky in under a minute and you can handle it after a few minutes. However, any gloss varnish will work. Paint a layer of varnish where you wish to place the small part, including Photo-Etched parts, and then lay the part on the wet varnish. The natural tackiness of the varnish holds it in place and you can add more varnish over the top for additional security. Other gloss varnishes that you can use include Micro-Scale Gloss, Vallejo Gloss Varnish, Model Master Gloss, and Liquitex Gloss Medium & Varnish. Using a small paintbrush wet with gloss varnish is also a useful way to hold tiny parts and put them into the correct position. 6. Clear Rubber and Silicone Cements Clear rubber and silicone glues are offered in a wide range of tube glues intended for home use that carry the name ‘All Purpose’ or ‘Universal’ glue. These glues generally dry clear and remain rubbery. Most of these are solvent based, but manufacturers identify some of them, that do not contain any solvents, as being “safe for children”. These are not suitable for general modeling use because they are difficult to apply in small amounts, can be stringy and generally do not produce a bond as strong as the previously discussed adhesives. These glues only work well when there is a large surface area. However, they can be handy for special work such as:
7. PVA Glue PVA glue, or PolyVinyl Acetate, is thin water based white glue that remains rubbery when it dries. One such example is Gorilla Glue. It has a wide range of commercial and domestic uses. For example, in the construction trade you can thin it and use it to prime walls prior to painting. It is very popular in kindergartens and schools because it is ideal to use on paper and card stock, and safe for children to use. It can be found in building suppliers (where it is sold by the gallon) and in arts & crafts stores. The uses for PVA adhesive are the same as for clear glue in the previous section. The difference is that it is thinner and water based, so is more suitable for situations where you can brush it on a large area. The bond is not as strong as with clear glues. Once dry you can peel PVA glue off most surfaces. This glue is particularly useful for dioramas when it can be watered down and painted all over the base to fix the grass, sand, pebbles and other landscaping materials into position prior to painting. 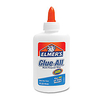 8. White Glue / Woodworkers glue This looks very much like PVA glue, being white and water-based but it is more viscous. It has limited use for most modeling applications, but is very good at bonding wood, so may be useful when making dioramas or bases. Common manufacturers for white glue are Borden’s (Elmer’s) and Gorilla. Some modelers use it to bond clear parts such as canopies, vehicle windows, light lenses, etc. It may dry clear or white depending on the manufacturer. Conclusion Just like the many different subjects we all model there are as many different glues you can use, hopefully this little effort has helped you understand the different types of glues available and what they are best suited for. I have not identified all the manufacturers of glues or the names, I imagine most of you are already aware of them and you have your favorites. As with religion and politics, we all have an opinion of what glue is best and what we are comfortable using on our projects. I hope that this may help some of the newer modelers use the correct type of glue, and avoid a mistake that could otherwise ruin a great effort. One suggestion though, don’t try to mix glues to speed the drying process or make them stronger, it probably won’t work and may make you wish you had thought it through a little better. Oh yeah, make sure you keep the debonder or acetone close at hand. |
Archives
February 2017
|
