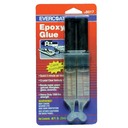
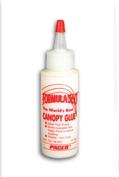
We have all had to ask that question before, of ourselves or of a friend or fellow modeler with more experience. Oh, we all have our own favorite kind of glue, but that does not mean that favorite is the right one for the job at hand. If you are attaching a canopy to a model plane, for example, then you do not want to reach for the CA (Superglue) or liquid cement. Both of these glues will result in a capillary action that will ruin the clear plastic of the canopy. If you are working on a 90mm metal figure, for another example, then reach for the epoxy. CA is good for tacking the arm or head in place, but it is not going to be strong enough to keep them in place – epoxy is.
This Musing will deal with the various types of glue available to modelers, explaining their characteristics, advantages and disadvantages. One very important factor to remember is that the vast majority of model glues and cements contain toxic chemicals, such as Methyl Ethyl Ketone (MEK or butanone) or cyanide, as a major component of their makeup. These chemicals can result in fumes as the glues cure that can be dangerous, or even poisonous, and flammable if not used in well-ventilated areas.
In the early days of the hobby, one type of glue was used almost universally, thick polystyrene cement in a tube. Today, because high quality scale models are no longer made simply of styrene plastic, numerous types of glue may be required. Today scale models may include polyurethane resin; various metals; rubber and/or soft vinyl. Getting the right glue for the job is very important, so modelers need to know what is available and on what they work best.
The main types of glue that a modeler will need in their armory are:
- Polystyrene cement (Testor’s cement, Testor’s Liquid Cement, Ambroid, Tenax, Tamiya Super Thin, etc.)
- Cyanoacrylate (‘super glue’)
- Epoxy Resin (5 minute epoxy, 30 minute epoxy, Apoxie Putty, etc.)
- Clear ‘canopy’ glue
- Gloss varnish
- Clear rubber/silicone cement
- PVA adhesive
- White glue/wood glue
Use minimum amounts only and do not use it on a model where it will take a long time to dry. Polystyrene cement works by dissolving or softening plastic with MEK to form a bond as the glue dries. This type of glue is only suitable for rigid polystyrene plastic, the type used for injection-molded kits. In effect, the two pieces of plastic are welded together, so a very good bond is formed that is as strong as the plastic.
The drying time varies depending upon how much glue you apply and how thick the glue is. The thinner the cement used the faster the drying time. Thin liquid formulas will normally dry in seconds, but the very thick tube glue may take a few hours. It is important to remember that even after a bond forms between two pieces of plastic the plastic may not have fully re-hardened so handle the bond carefully.
The major disadvantage of poly cement is that if you use too much it may completely dissolve the material you are gluing and damage it. In addition, if you drop or smear any glue on the surface of the model it will damage any surface detail. For this reason, you must use care and use the minimum amount of glue. Furthermore, do not place glue into holes and cavities unexposed to the air, because it will not be able to dry and will slowly dissolve the surrounding plastic.
CAUTION - Before proceeding with a discussion of the glues, I would like to provide you with some information on MEK. Methyl ethyl Ketone, also known as 2-Butanone, is a colorless liquid solvent with an acetone-like odor. It is volatile and potentially explosive. Its main uses are in the manufacture of a number of resins, waxes, and coatings, as well as a general industrial solvent for nitrocellulose coating, vinyl film, and smokeless powder manufacture. US chemical companies produce more than 500 million pounds of it each year, and exposing probably more than three million workers to it annually.
MEK exposure can cause, but is not limited to, the following symptoms:
· Irritation of the nose and throat (begins at 100 ppm)
· Eye irritation (start at 200 ppm)
· Dermatitis of the face (Begins at from 300 ppm to 600 ppm)
Narcosis can occur (at elevated concentrations).

Although tube cement has lost popularity over the years, it does still have its uses. It is easy to apply a very small drop precisely where you need it and the slow drying time gives the modeler plenty of time to position the parts correctly.
Medium viscous cement This normally comes in plastic bottles that have a long thin hollow tube to apply the glue. It is more user-friendly than the thick glue, being less likely to dissolve away the glued part. It also dries much faster than the tube cement, while still giving you time to position the parts.
Ultra-thin or liquid poly cement This type of glue normally comes in small glass bottles with a brush applicator, or you can use an old small paintbrush. The glue does not stick the paintbrush bristles together even when the cement dries on them. The bristles may become stiff, but you can easily soften them by rubbing them gently.
One thing to be aware of when using liquid poly cements is that they are not all the same. While this type of glue always looks the same, the amount of solvent in it varies from one manufacturer to another, resulting in one being “hotter” than another manufacturer’s. This makes it important when using cement from a manufacturer you are not familiar with that you first test the glue on some scrap plastic or sprue to determine how strong it is and how quickly it dries.


The fast drying time of this type of glue means that it is very unlikely to damage parts unless you accidentally drop some on a visible surface. One disadvantage with this glue is that there is only a very limited time to assemble the parts after applying it. There must also be a good contact between the joint surfaces as this is definitely not a gap-filler.
2. Cyanoacrylate Adhesive (‘Superglue’ or CA) Originally developed to bond surgical incisions in the 1940s, this type of glue bonds human skin almost instantly and can cause permanent damage to the eyes.
Cyanoacrylate glue hardens very quickly when trapped between two surfaces. Condensed water vapor on the surfaces (namely the hydroxyl ions in water) causes this reaction. The water comes from the surrounding air, so obviously the air humidity is a factor that may affect bonding capabilities, or cause them to differ from application to application.
Cyanoacrylate molecules start linking up when they contact water, as they link up they whip around in chains to form a durable plastic mesh. The glue thickens and hardens, starting at the outer edge, until the thrashing molecular strands can no longer move.
Because the curing reaction moves from the surface and outer edges of the glue, thick seams or large blobs of glue may harden less satisfactorily than surface-to-surface bonds with good fit. In a thick blob of glue, the curing reaction may stop before it reaches the center of the blob. Generally, you should avoid any seams thicker than 0.25 mm. Thick seams will also take longer time to cure.
When first introduced, advertisements claimed CA glue was capable of instantly bonding almost anything to anything else. While CA glues are very versatile, there are certain materials that regular super glue does not bond, including wood, leather and vinyl. Special formula CA glues are available that does bond these materials. Regular CA is very good for bonding hard plastics, resin and metals to each other, which makes it very useful on multi-media kits. However, it is not easy to use and novices and children should avoid its use. Because of the fast setting time of CA glue, it can be unforgiving. Thin formula CA cures in only a very few seconds and very often is more successful at gluing your fingers to the kit much better than the kit parts.
Unlike polystyrene cements, which dry from their exposure to air, CA glues dry because of the absence of air.
Although CA will stick most things together, the quality of the surface is far more important than when using polystyrene cement. Any dust, oil or grease on the surface will substantially reduce the strength of the bond. Rough surfaces stick better than smooth ones, so a light sanding of the surfaces that are to be bonded is worth considering.
If CA accidentally gets on the wrong surface, immediately wipe off the excess with a paper towel. Leave any residue to harden and then scrape it off with a sharp knife. If your fingers or other human tissue is accidentally bonded, carefully separate the bonded skin using superglue debonder or acetone (fingernail polish remover), which should always be available when CA adhesives are being used.
Only a small fraction of the CA adhesive purchased is actually used. This is because once open, it deteriorates quickly and it very easily blocks the nozzle of the bottle, which often makes it impossible to get at the remaining contents. To reduce this problem, always wipe the end of the nozzle, gently tap the bottle on a hard surface to encourage any glue on the inside of the nozzle to go back down and put the top back on straight away. If you are not going to use a bottle of superglue for some time, placing the bottle in the refrigerator extends the shelf life.
CAUTION – The use of superglue comes with its own set of health hazards. The fumes from CA glues will cloud clear plastic parts – do not use to attach windscreens and cockpit canopies, etc. Special glues are available for this purpose (see section 4, Clear ‘Canopy’ Glues).
The glue has a distinctive, strong, acidic odor. Because the fumes from curing superglues contain cyanide, breathing them is irritating for your nose, throat, bronchial tubes and lungs. For some individuals, repeated or extended exposure to fumes may prompt chronic allergic reaction. In dry air (less than 50% humidity), fumes may be also be irritating to eyes, stimulating tears.
In contact with the skin, the primary risk with the CA is bonding fingers or other body parts together, or to model parts. This goes also for eyelids.
While skin or eye contact with CA is non-toxic, it may still be necessary to seek medical help if the body parts are bonded. Never try to tear apart the bonded body parts!
CA cannot trigger allergic reactions through skin contact.
The wisdom of the above is that you should use safety glasses and breathing masks when working with these glues. A well-ventilated area is also necessary.
Like poly cement, CA glues come in three viscosities, from ultra-thin to thick (also known as gap-filling superglue).
Thick (Gap-filling) CA Where two parts do not meet closely using gap-filling superglue bonds the two pieces and fills the gap. However, it is not the ideal filler. Applying the right amount of glue to fill the gap can be difficult to do without leaving a depression or having some ooze out on the model. It is also difficult to work it to the correct shape when it is drying and to sand it smooth once dry. Only a short time exists between the glue becoming firm, when you can sand it, and when it becomes too hard to sand.
Thick superglue takes a long time to cure, but it is possible to buy an activator spray, i.e. Zap-A-Gap, that hardens it almost instantly, or you can add Micro Balloons or baking soda to speed up the curing time and improve the strength of the bond.
Medium CA
This is probably the easiest viscosity CA to use. When using CA for applying PE parts this is normally the glue you should use because unlike the ultra-thin variety, it will not run everywhere and it normally has about the right drying time. When you buy superglue from a hardware store for domestic use, it will probably be medium viscosity.
Ultra-thin CA You should be careful when using this type of CA. Unlike ultra-thin poly cement, you cannot apply it with a normal brush because it would ruin a brush with each application. Sometimes, it will come with a special applicator consisting of a thin plastic tube, but applying the right amount without it running everywhere can be difficult. Some thin superglue come in a bottle with a brush and these may be the easiest to apply.
The advantage of the ultra-thin superglue is that parts can be assembled ‘dry’ and then the adhesive is applied to flow along the edges where it is sucked in by capillary action. It bonds very fast – sometimes in only one or two seconds.

Like superglue, you can use epoxy to glue almost anything to anything, but they also need clean, grease free, and preferably, roughened surface to provide the best bond.
You can purchase epoxy glues and putties with setting times varying from 5 minutes to 24 hours. It is useful to keep both quick and slow setting varieties around. While the slow drying varieties theoretically produce a stronger bond, this is not as important in scale modeling as even the quickest setting varieties produce a very strong bond.
Because of the slow drying time, it is normally necessary to support the parts you are gluing until the adhesive begins to harden.
If you squeeze excess glue out, leave it until it begins to harden, then you can cut it away cleanly. Attempting to wipe it away immediately will invariably result in a messy smear.
Epoxy glues are great when you need to create a very strong bond, especially between two different materials, for attaching heavy resin parts or working with white metal figures. Epoxy is not commonly the glue of choice for most modelers because it:
· requires mixing
· is easy to mix far more than you need
· tends to be messy.
Still, you will usually find a double syringe of it in the bottom of every modeler’s toolbox.

‘Canopy’ glues are glues specifically designed for use on clear plastic parts. They appear to be very similar to the clear adhesives described in the next section, but tend to be less viscous and so it is easier to apply them in small amounts. Not only do they not affect the clear parts but also by drying completely clear any excess is almost invisible. Note however, that the bond is not as strong as some of the glues previously discussed, but it is normally quite adequate.
In addition to using these as glue, you can use some brands to create a membrane to form windows across small gaps such as in models of airliners. Once dry you can shape it, due to being water-soluble, by lightly moistening a paper towel and rubbing until you obtain the desired shape.

Johnson’s Future/Klear Floor Wax is one of the more common names dropped by modelers when discussing gloss varnish. It works very well because it becomes tacky in under a minute and you can handle it after a few minutes. However, any gloss varnish will work. Paint a layer of varnish where you wish to place the small part, including Photo-Etched parts, and then lay the part on the wet varnish. The natural tackiness of the varnish holds it in place and you can add more varnish over the top for additional security. Other gloss varnishes that you can use include Micro-Scale Gloss, Vallejo Gloss Varnish, Model Master Gloss, and Liquitex Gloss Medium & Varnish.
Using a small paintbrush wet with gloss varnish is also a useful way to hold tiny parts and put them into the correct position.
6. Clear Rubber and Silicone Cements Clear rubber and silicone glues are offered in a wide range of tube glues intended for home use that carry the name ‘All Purpose’ or ‘Universal’ glue. These glues generally dry clear and remain rubbery. Most of these are solvent based, but manufacturers identify some of them, that do not contain any solvents, as being “safe for children”.
These are not suitable for general modeling use because they are difficult to apply in small amounts, can be stringy and generally do not produce a bond as strong as the previously discussed adhesives. These glues only work well when there is a large surface area. However, they can be handy for special work such as:
- Small drops can temporarily hold parts in place when doing a test fit; you can pull the glue away later.
- Adhering model tarpaulins and other flat stowage to armored vehicles.
- Gluing flexible materials such as rubber tires.
- Gluing clear parts such as cockpit canopies (although glues specially made for this purpose are available).
7. PVA Glue PVA glue, or PolyVinyl Acetate, is thin water based white glue that remains rubbery when it dries. One such example is Gorilla Glue. It has a wide range of commercial and domestic uses. For example, in the construction trade you can thin it and use it to prime walls prior to painting. It is very popular in kindergartens and schools because it is ideal to use on paper and card stock, and safe for children to use. It can be found in building suppliers (where it is sold by the gallon) and in arts & crafts stores.
The uses for PVA adhesive are the same as for clear glue in the previous section. The difference is that it is thinner and water based, so is more suitable for situations where you can brush it on a large area. The bond is not as strong as with clear glues. Once dry you can peel PVA glue off most surfaces.
This glue is particularly useful for dioramas when it can be watered down and painted all over the base to fix the grass, sand, pebbles and other landscaping materials into position prior to painting.

Conclusion
Just like the many different subjects we all model there are as many different glues you can use, hopefully this little effort has helped you understand the different types of glues available and what they are best suited for. I have not identified all the manufacturers of glues or the names, I imagine most of you are already aware of them and you have your favorites.
As with religion and politics, we all have an opinion of what glue is best and what we are comfortable using on our projects. I hope that this may help some of the newer modelers use the correct type of glue, and avoid a mistake that could otherwise ruin a great effort. One suggestion though, don’t try to mix glues to speed the drying process or make them stronger, it probably won’t work and may make you wish you had thought it through a little better. Oh yeah, make sure you keep the debonder or acetone close at hand.


