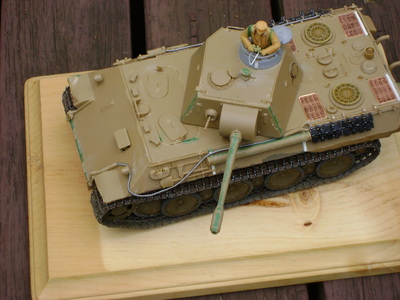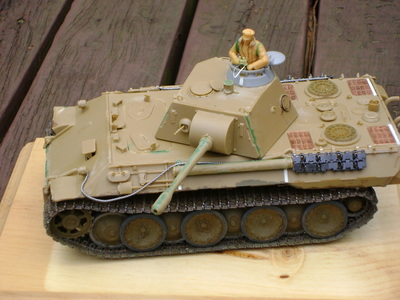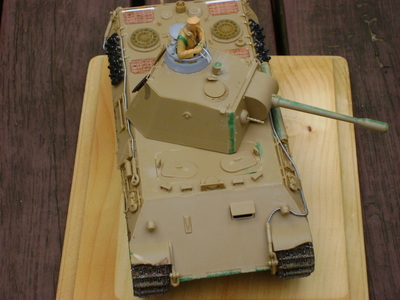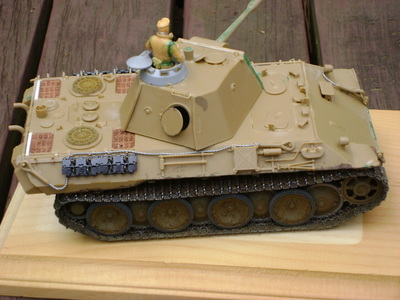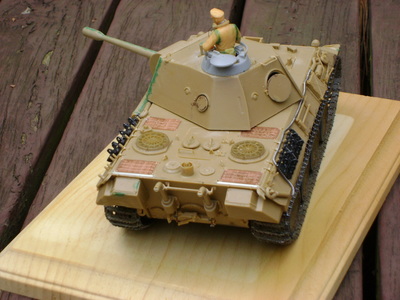
The Panzerbeobachtungswagen Panther was designed to occupy a forward position—hence the need for armor—observe the effectiveness of artillery fire, and radio corrections based on fall of shot. In creating the beobachtungswagen the Panther tank’s standard 75 millimeter main armament was replaced with a dummy gun. The vehicle was armed with a single machine gun, mounted for defensive purposes in the right front of the turret—its mission was not fighting. The space normally occupied by a Panther tank’s cannon was taken up in by a binocular rangefinder, a retractable and fully rotatable turret observation periscope, a plotting board, and extra radio equipment.
Ukrainian company ICM has produced a kit of this rare beast, molded, with the exception of its individual link tracks, in tan styrene. While some of the parts have a little flash, the level of detail is generally good—better in many cases than all but some of Dragon’s Panther kits.
My kit had its drawbacks. The first encountered was some minor warping in the lower hull’s sponsons. This gave trouble when joining the lower hull and rear plate, and a major clamping effort was required when the time came to join the upper and lower hulls. A more aggravating difficulty came from two major parts that simply did not fit. The plate with openings for the driver’s and radio operator’s hatches, part B42, was too large. A great deal of sanding, while attempting to maintain the correct shape of the plate’s rounded corners, ultimately resulted in an acceptable but less than perfect fit. The same defect was encountered with part B34, the engine hatch. Less sanding was needed to get this part in place, but both problems were both puzzling and frustrating. A note about an ICM peculiarity: There are no numbers on the sprues; when in doubt, a modeler must refer to the numbers on the sprue diagrams on page one of the instructions.
Another area of poor fit was the join between the main part of the turret, D1, and the turret floor, D2. Getting the turret floor installed properly— that is, level—is important. I didn’t, and this adversely affected the sit of the turret. Much carving and sanding was needed to correct this error.
Aside from a warped hull and the two really-ill-fitting parts, the only other major concern was breakage of some of the smaller parts. Although the kit’s styrene doesn’t seem especially brittle, a couple of parts were broken on the sprue, and a few broke coming off the sprues. Four of the five grab irons on the hull top ended up broken; I managed to install them and join the broken ends, mostly successfully. I ended up using a small razor saw to cut off delicate parts without putting too much torque on them. In the case of the kit’s shovel, its handle looked so slender that I reinforced and beefed it up with thick super glue before taking it off the sprue.
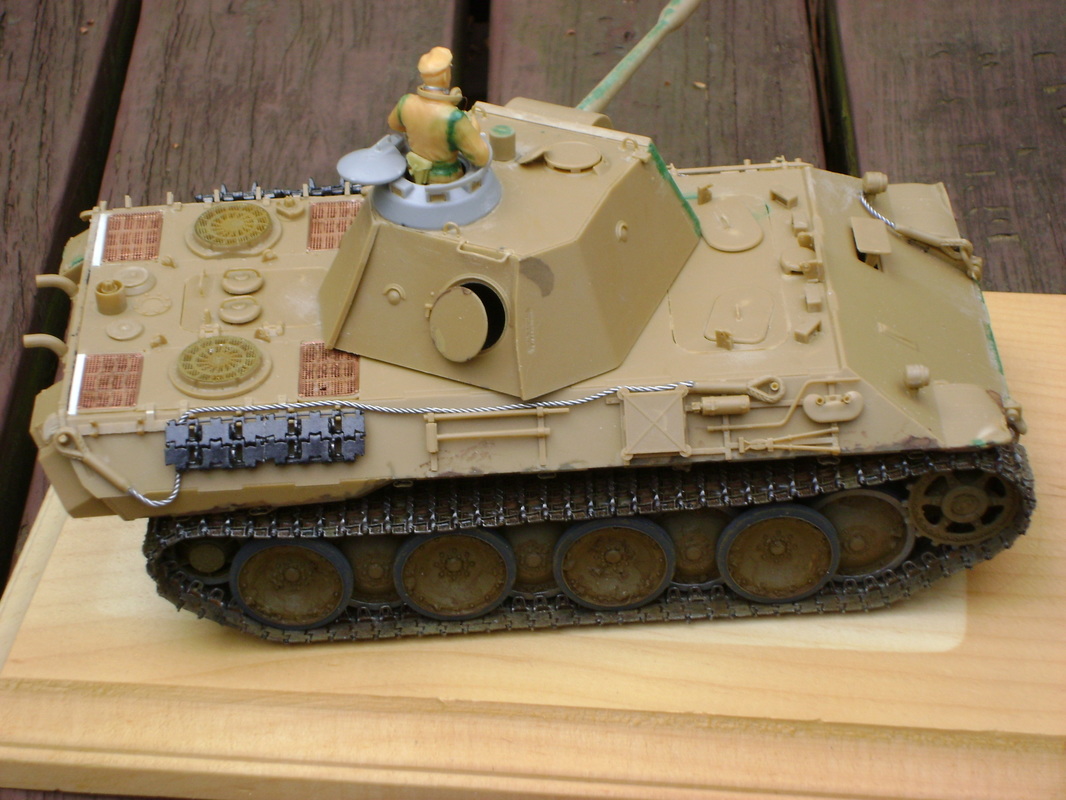
The ICM kit’s individual track links are perhaps the poorest detailed parts of the model. As I despise individual styrene links generally, and since I had a set of Friulmodel late-type Panther tracks on hand, I used those. Eighty-four genuine metal links per side did the trick (eighty-six links were standard for a real Panther), resulting in perfect sag on one side and a slightly tight but still okay profile for the other track. Knowing I would have to clamp the upper and lower hulls to join them properly, I did that prior to installing the Friul tracks. As a result, with the hull resting upside-down, I had to feed the track runs between the front fenders and the drive sprockets, a bit at a time, until enough track was through to pull the rest of the way, past all the road wheels to the rear idler.
Making the final join is always a challenge with Friul tracks. The two ends of the track run must be held together, usually under considerable tension, while the last wire pin is inserted. This almost requires a third hand. The wire Friul provides is prone to bending under these circumstances, so I used sections of much sturdier insect mounting pins and made that final joining with relatively little trouble.
The ICM beobachtungswagen comes with the “drum” cupola standard for D-model Panthers. Since the only decent photo of this vehicle shows the cast cupola found on later Panther tanks, and since this was also a common retrofit for Panther Ds, I did some surgery and replaced the ICM drum cupola with a cast one from a Dragon kit. That single decent photograph also shows a vehicle carrying the triple smoke dischargers originally found in forward locations on either side of Panther D turrets. These smoke grenade launchers were prone to catching fire if hit by bullets or shrapnel, and were usually removed after 1943. So, my rebuilt tank has had the mounts for these dischargers cut off, in a manner often seen on early model Tiger Is. An added incentive for doing this was that the parts for these dischargers were some of the kit’s more poorly represented ones.
My beobachtungswagen also does without the skirt armor designed to protect the space between the tops of a Panther’s road wheels and the bottom edge of its upper hull. Why hide most of the beautiful metal tracks I had worked so hard on? It was not uncommon for Panthers to be seen without these skirts, and ICM molded them as single strips, complete with their hangers, rather than as separate plates (six per side). I did add the mountings that the skirt hangers fit into, made from lead foil stiffened with thick super glue and attached to the bottom edges of the hull sponsons. I mangled a couple of these threading the track runs onto the kit’s suspension; this damage I attribute to . . . debris caught in the tracks?
At this point, the only major task left to be completed is the scratch-building of a crow’s-foot antenna for my panzerbeobachtungswagen’s command radio. No problem, right? This will be an SS vehicle, logical since the Waffen SS was generally first to get the newest and best in the way of equipment. With as little documentation as is available, the paint scheme can be practically anything. Markings will be limited to small national crosses, as befits a late-war vehicle filling a role in which it needed to be as inconspicuous to the enemy as possible.
I’ve covered the major points of this build here. More was done, and more could have been done with unlimited funds, unlimited time, and more ability on my part. Given the dollars and the inclination, for instance, the kit’s tools, while adequately detailed, could be much improved with the addition of photo-etched parts. In any case, overcoming problems and improving what came in the box to get a better finished product provided most of the fun. And fun is what it’s all about.
