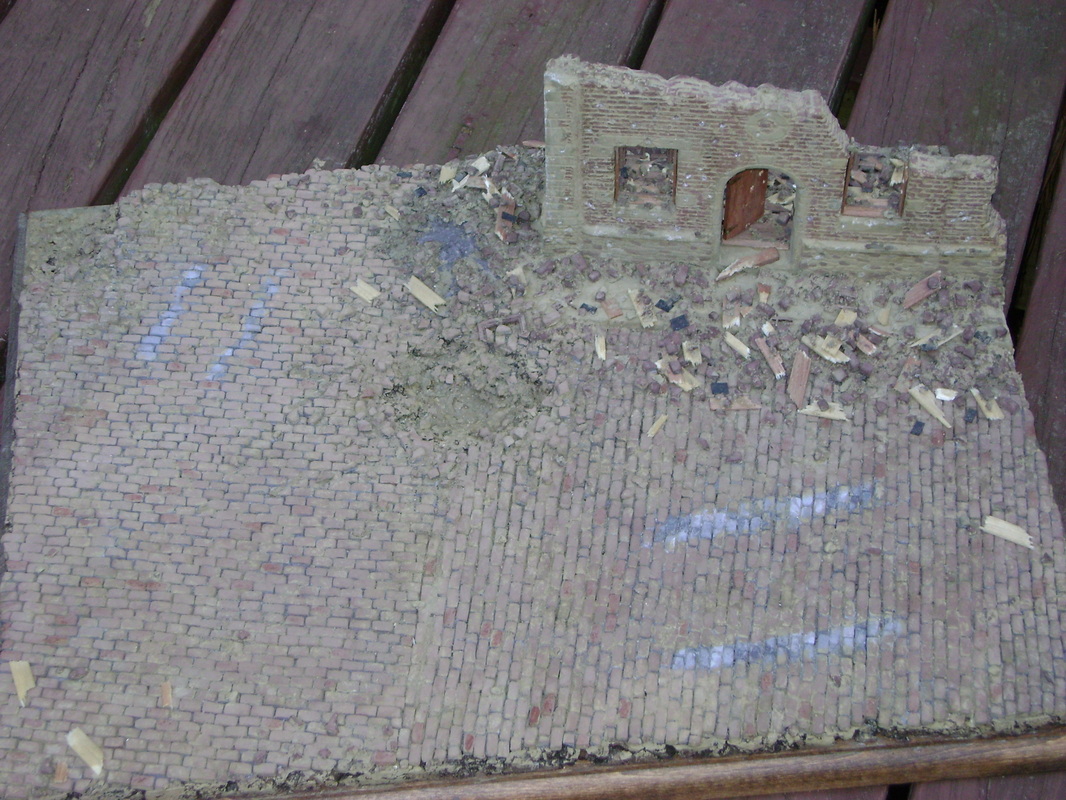
I have just completed an urban diorama setting with dimensions of 12 by 16 inches. The diorama, to be set in France in late July, 1944, during Operation Cobra, will include a pair of vehicles, a partially destroyed building, and several figures. Since a building will be part of the scene, I followed my usual practice of increasing the height of the base by first putting down a layer of cork panel. Even if it has no basement, a building’s ground floor will be some distance above the ground. The cork layer makes it possible to replicate this. In addition, the cork provides a convincing-looking substrata for either a town or a country setting.
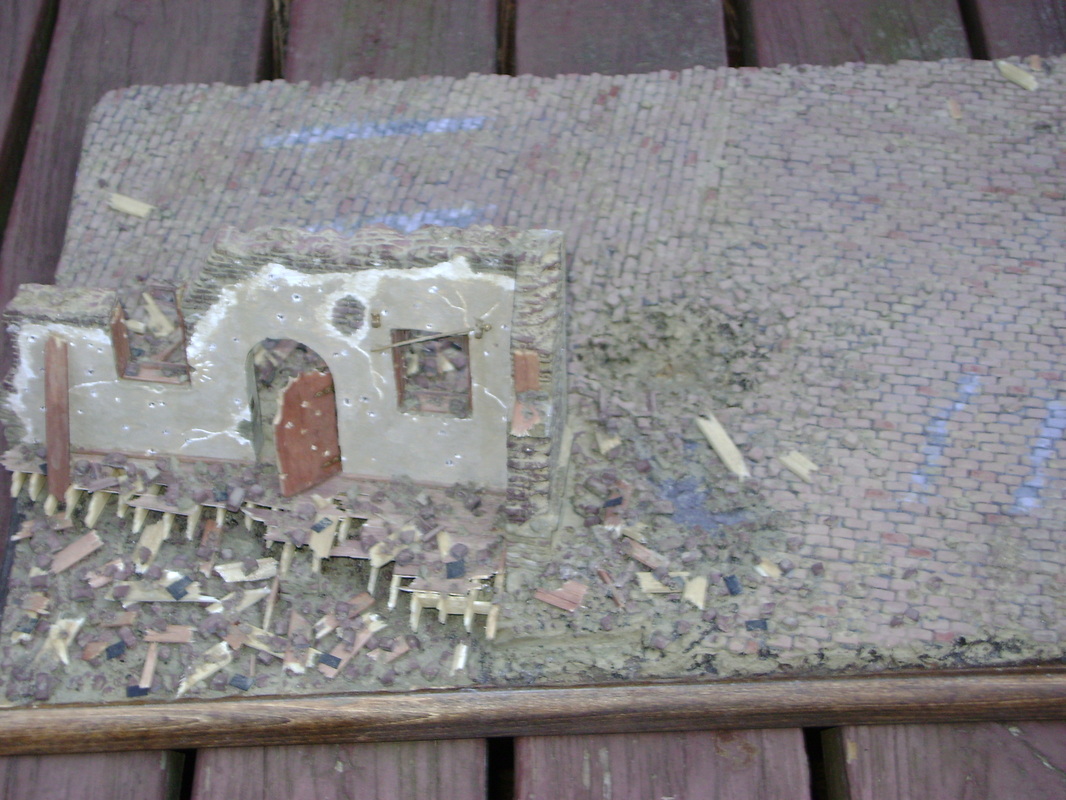
I “cut and pasted” and otherwise ravaged parts of a Verlinden Products Ardennes farmhouse to create a ruined building. Verlinden buildings being detailed on their exteriors only, carving and scribing was required to give detail to my ruin’s interior. Exposed brick and stone as well as cracked and pock-marked plaster were added to the inside surfaces. Whether destroyed by artillery, bombs, or a combination of the two, a lot of shrapnel and debris fly through the air when a building is brought down. The exterior of my destroyed building was liberally pock-marked too, representing damage from fragments coming from shell hits in the streets.
The Synergy Dio sidewalk is broad enough to allow the building walls to be glued to its back edge, with plenty of cracked and chipped sidewalk left exposed. This gets the building’s floor even higher off the base. As with the shell holes, the area behind my destroyed building was dug out. The idea is to simulate a fairly deep rubble-filled area under the remnants of the building’s flooring.
I painted that initial layer of rubble with Tamiya khaki. I find that, once weathered, it conveys the look of old concrete and masonry very convincingly. Once the brick and cobblestone colors had been painted in, I added the wooden bits of the ruin, followed by more rubble to blend that wood into the mess.
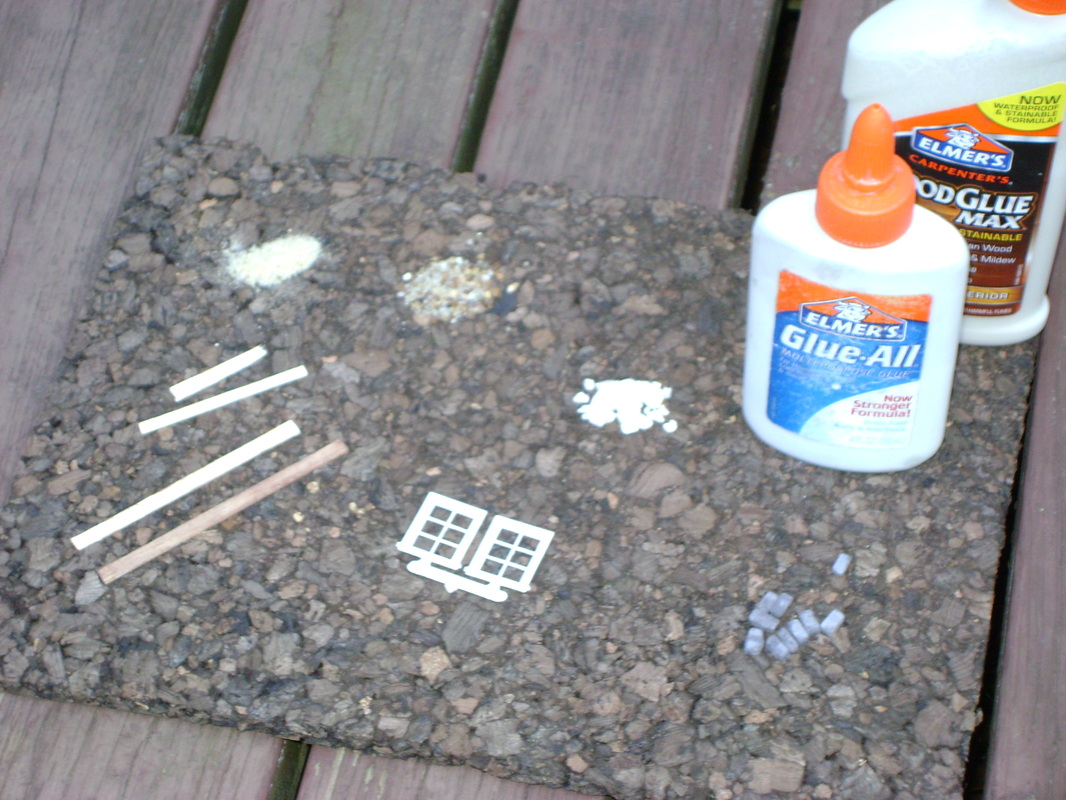
The remains of my building’s floor were made with white glue, balsa, and some basswood strip. It’s important that support beams be lighter in color than floorboards and relatively unweathered save for the all-pervasive dust generated by the building’s destruction. Rubble on the broken flooring was done as on the rest of the diorama—it takes surprisingly little there to look convincing. Enough to justify the apparent destruction without completely obscuring the floor, sidewalk, or street that so much effort has been expended on is the object with the rubble.
A building needs certain minimal details, like the vestiges of windows and doors, and such things as some sign of how curtains or shutters might have been supported. I made what was left of a door with stained balsa and Verlinden photo-etched hardware. Window openings were lined with stained balsa, and fragments of the windows were made from pieces of HO scale frames with slivers of clear styrene sandwiched in between to replicate glass. Fragments of window frame are also part of the rubble.
The cobblestones were painted with Tamiya flat earth, with random stones given a diluted touch of burnt umber craft paint. The bricks of the building and the broken bricks and bits of brick in the areas of rubble were painted with Tamiya red brown. Some bits of rubble were left in khaki, since part of the building’s construction is stone. Random stones in the lower reaches of the building’s exterior were painted lighter or darker than the prevailing khaki. All the Tamiya paints used were mixed with approximately twenty percent flat base for a dead-flat finish.
Some of the last touches to the rubble were fragments of glass, cut from clear styrene and pressed onto drops of white glue, along with some black-painted wooden roof shingles. Those latter are an O-gauge railroad product from Kappler. Again, a bit more brick, gravel and sand helped to blend those last additions with the rest of the debris. Lastly, everything was washed and daubed with very dilute Tamiya khaki, to represent the dust that covers all when a building falls. This helps to blend things and tie all the rubble together. Assuming this structure had been destroyed for more than a day or two, the khaki wash was used to add some subtle streaking from the weather outside and inside the structure.
One important note about my diorama’s ruined building: Once details had been scribed into the interior and the edges of its sections, I glued those sections to the sidewalk edges and to each other and filled gaps with acrylic modeling paste. That way, the mounds of groundwork could be added, and the building could receive a base coat of khaki along with streets and sidewalks. The drawback to this was that some contortions were required to finish painting and add details. Completely painting building sections and adding door and window details before putting the sections on the base would have had its own problems, chiefly with the filling of gaps and repairing the damage that would cause to the pre-painting. Either way will work—modeler’s choice.
Although a diorama such as this can be constructed and painted with a rougher touch than a vehicle or figures, an urban scene presents difficulties in the form of the many aspects that must be considered. If done thoughtfully and with attention to detail, though, it can provide an interesting setting for the men and machines of war. Creating a convincing urban scene isn’t easy, but it can be quite satisfying.


