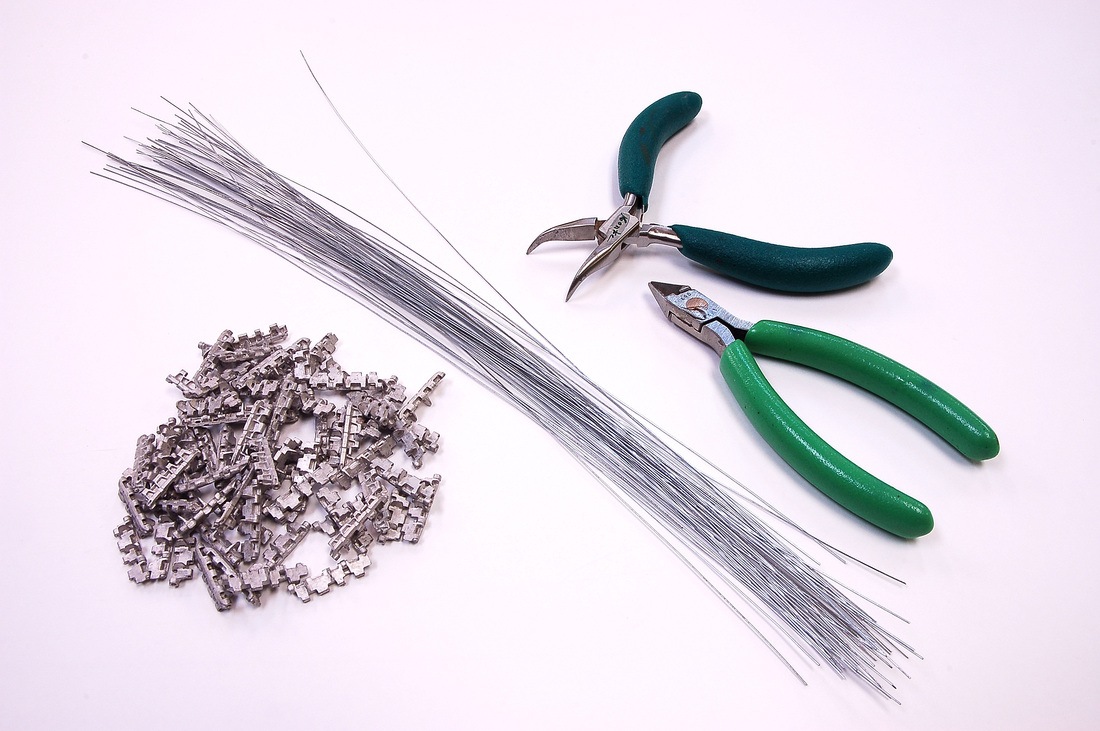
 The tools that will be required to assemble the tracks: curved needle nose pliers, good flush cut cutters, and the pack of Track Wire(50pc.) and the Fruil track links. 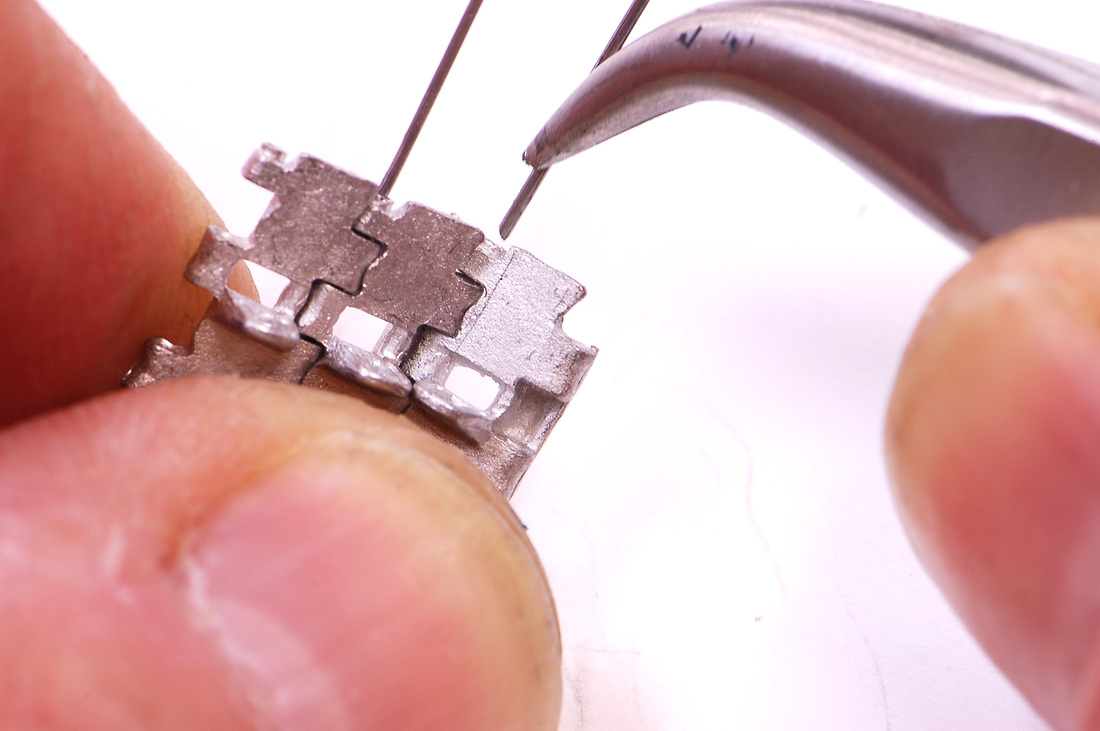 To start the process I pick up a couple of links of track and place them together. While holding them together the other hand grabs the Track Wire at almost the end of the wire(about 3mm in from the edge) with the needle nose and I press the wire into the bore to the plier tip.  I then move the pliers back another 3mm to 5mm and push in again. The feed is important as you don't want to be so far away that if there is any resistance in the passing of the wire in the bore that it stops the feeding and bends or buckles the wire. As the wire feeds in you will see it in between the track links giving you a idea how much more to press in. 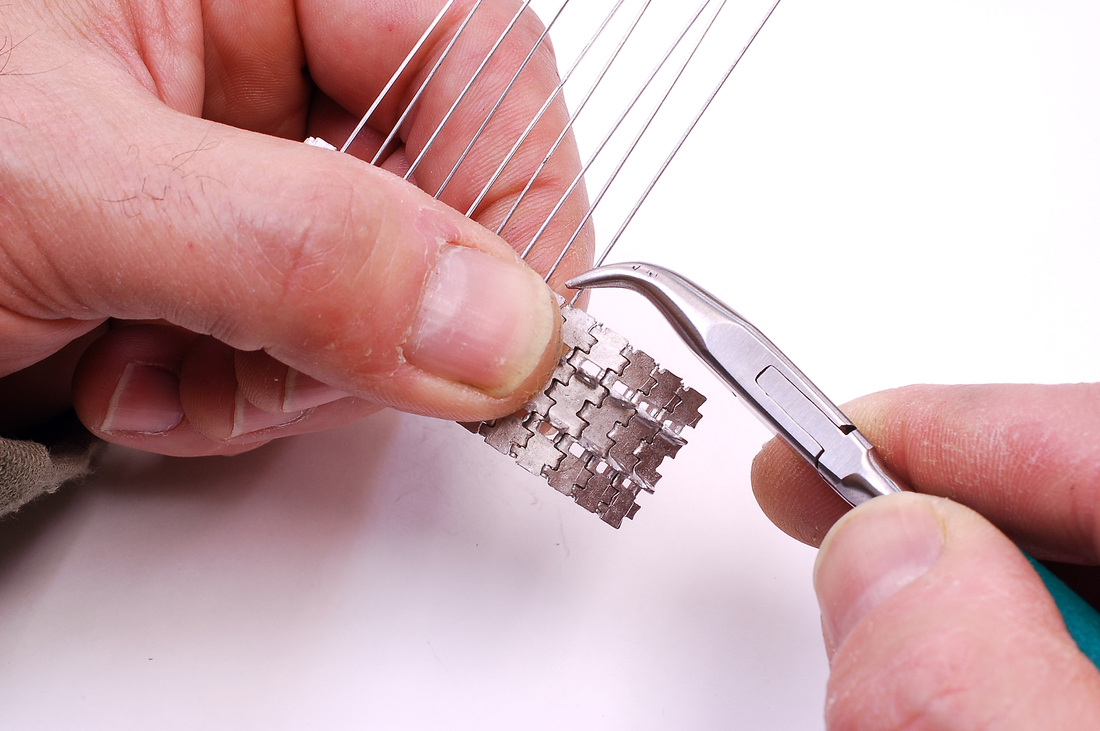 This is the correct way to hold the track run while you are feeding in the wire. I am holding from the top and bottom and this also aids in keeping the track links straight for a good feed. 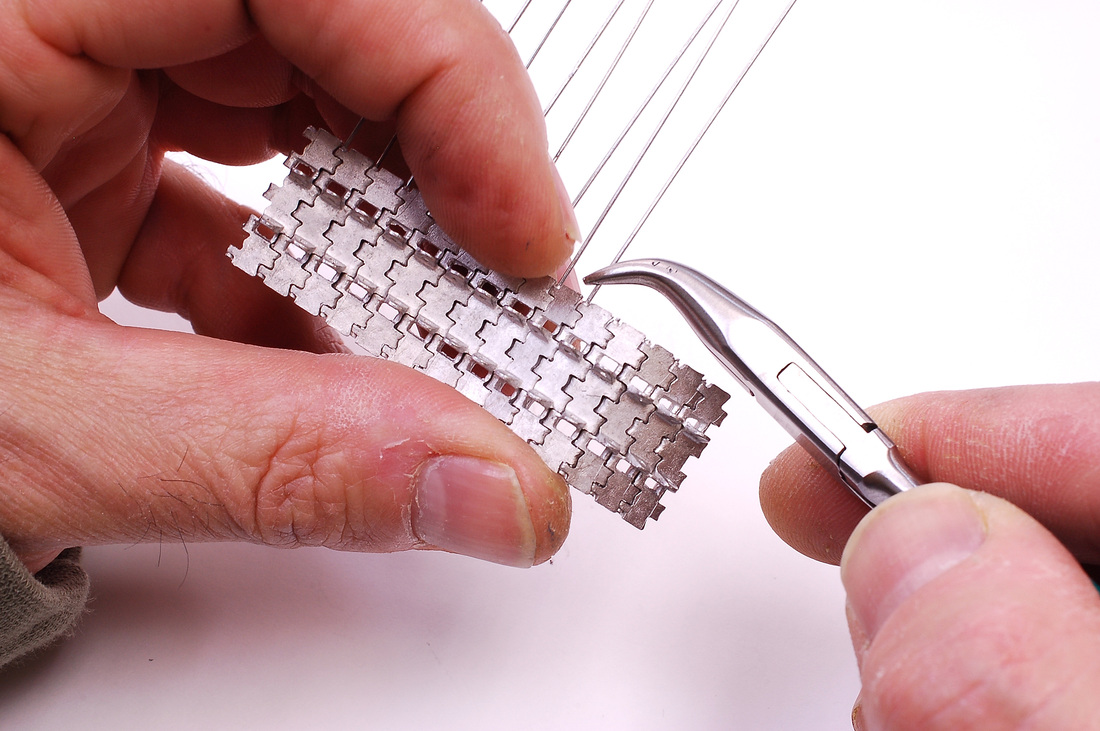 This my friends is not the way to hold the track while feeding wire, unless you fancy a painful finger prick if the wire passes through the end of the link. I speak from experience and my thumb is none to happy about it. 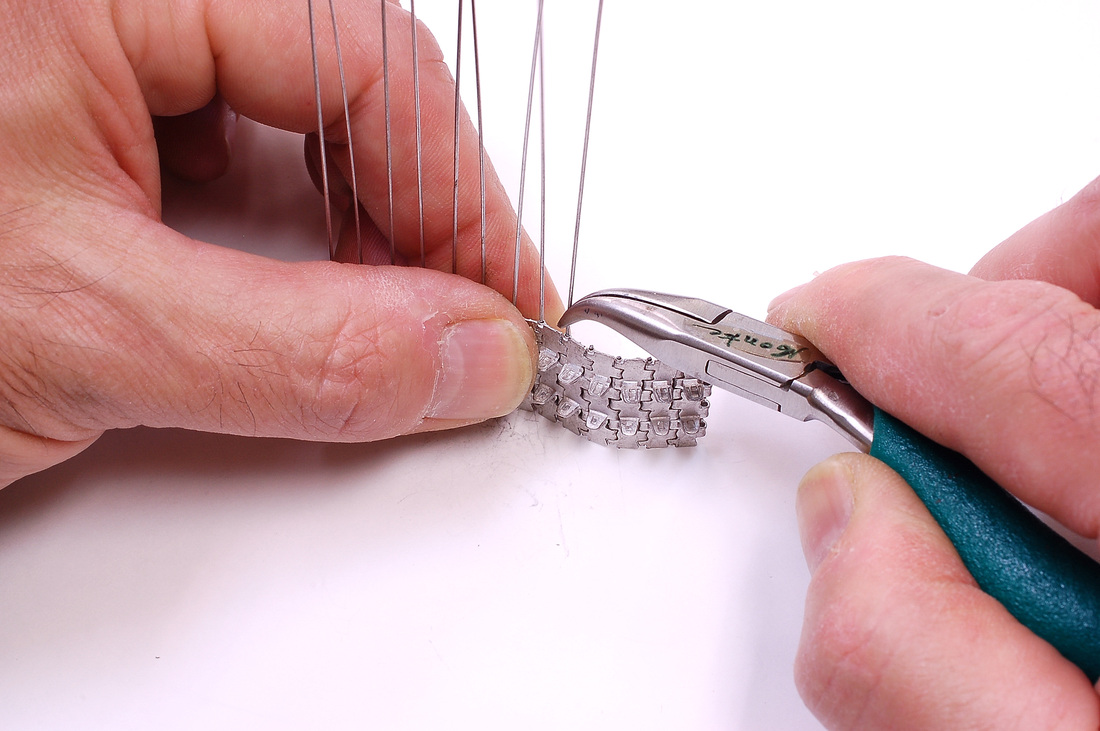 This is the safe way to get the last push of the wire to seat at the end without risk of pricking. You don't need to push very hard as the wire fills the last part of the bore in a way that in effect wedges it in place. This factor alone eliminates the need to add glue to keep the wire in. After feeling how the wire fits in the bore and the pressure required to feed it in things will start to speed up considerably. 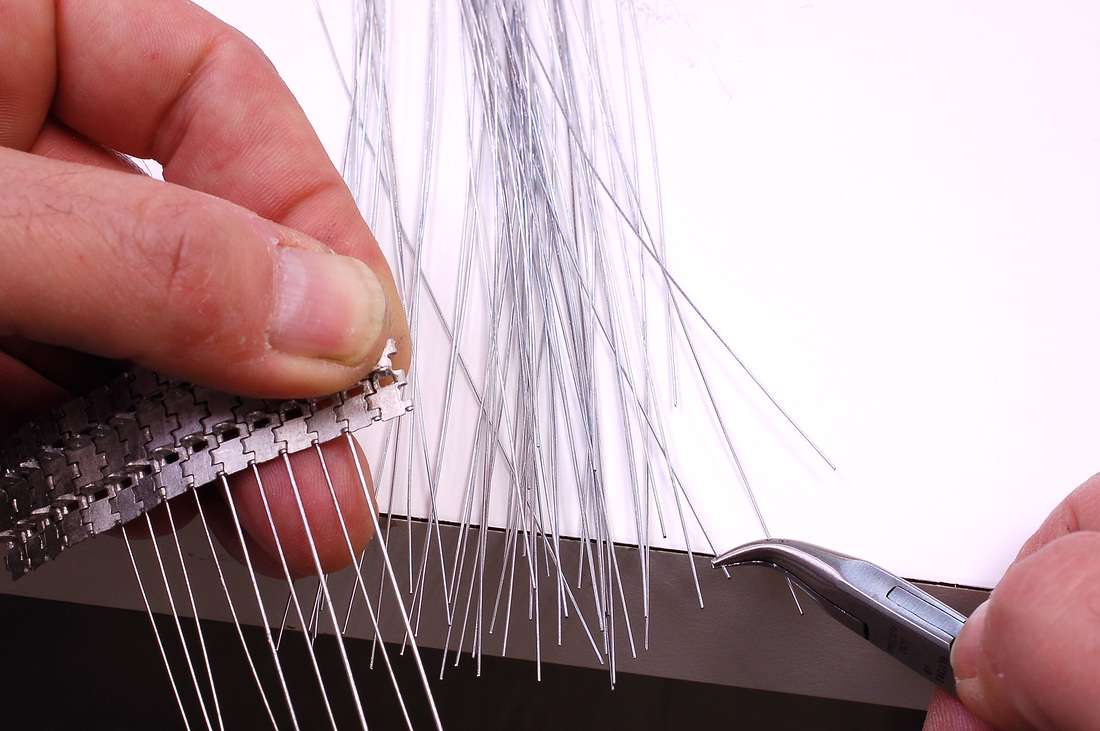 To move quickly through the process and to make sense of the quantity of wire supplied and its benefits, this is how I lay it out. the 50 pieces of wire are laid out on the edge of the table with a little overhang. I can then easily pick up fresh wire as I add another link. I pick up the wire as described before and feed it in, this step is repeated until I deplete the the 50 pieces of Track Wire. 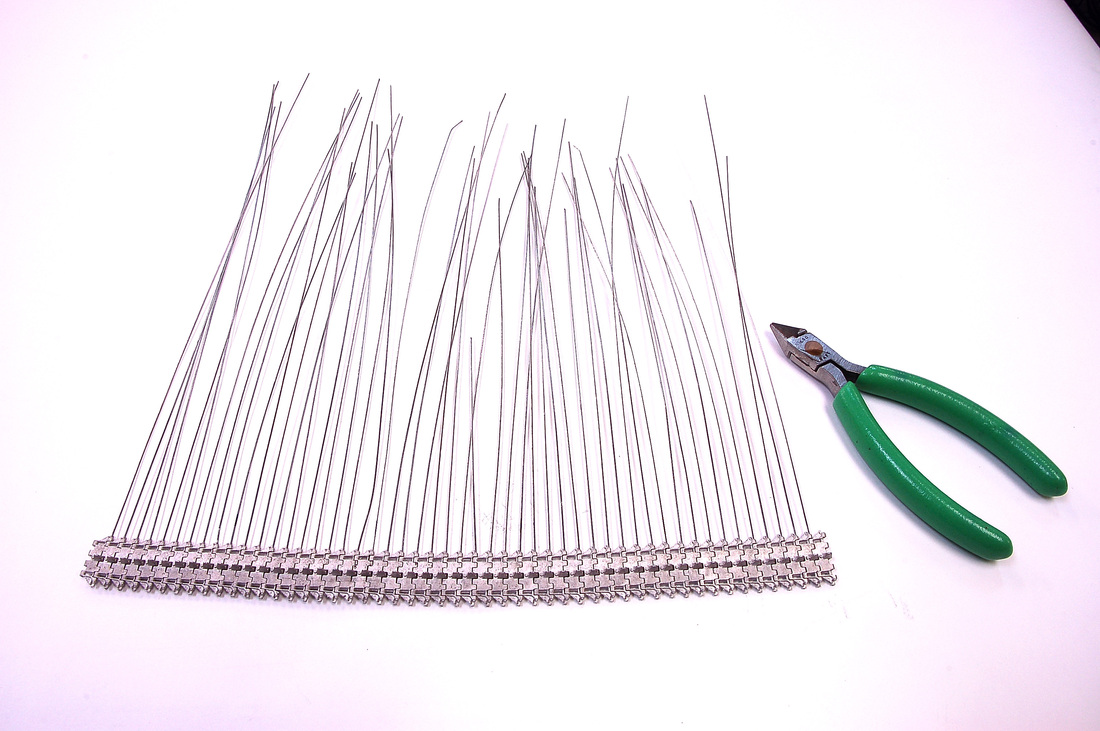 A run of 50 links is now ready to be trimmed of the excess wire. As I cut the wire I form a new pile on the table that will start the process over again. At this point my track run is more than 50% done, and depending on the final lenght there might be only 20 to 40 links left. 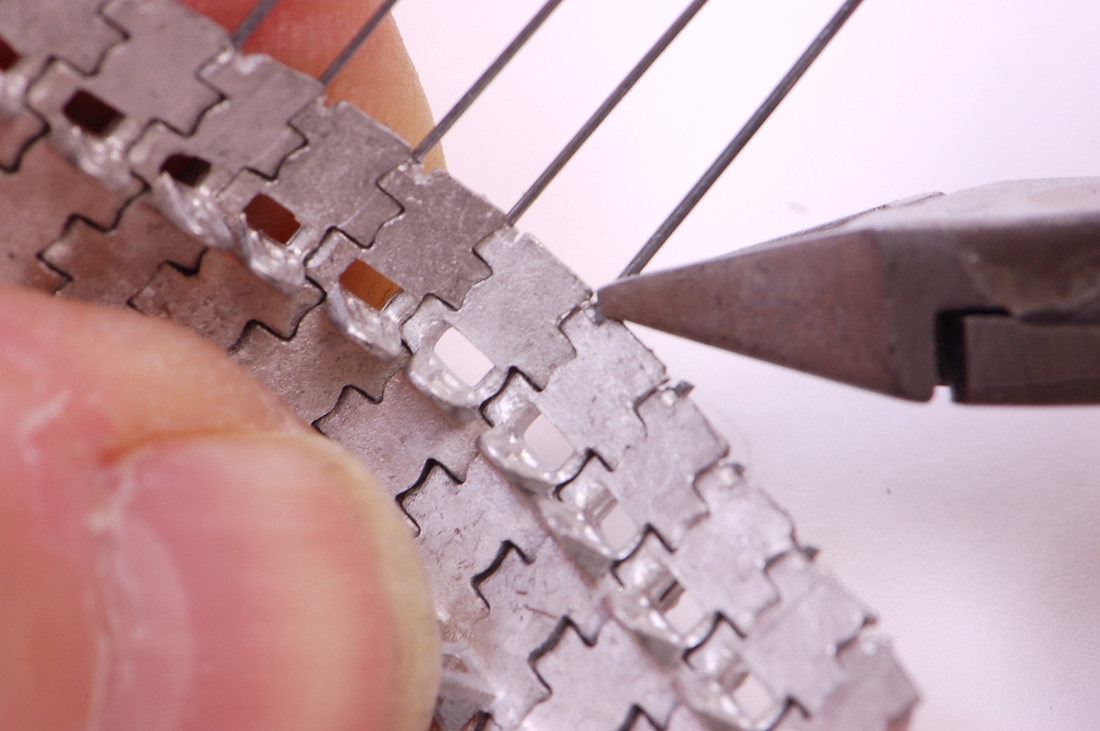 To cut the wire I butt the cutter tip right into where the bolt head would be and snip the wire. Be sure not to cut into the adjacent track link and damage it. Also when cutting the wire I aim it towards the table and my pile of clippings. The wire will shoot in whatever direction you point it , so for sure aim away from your face!!! 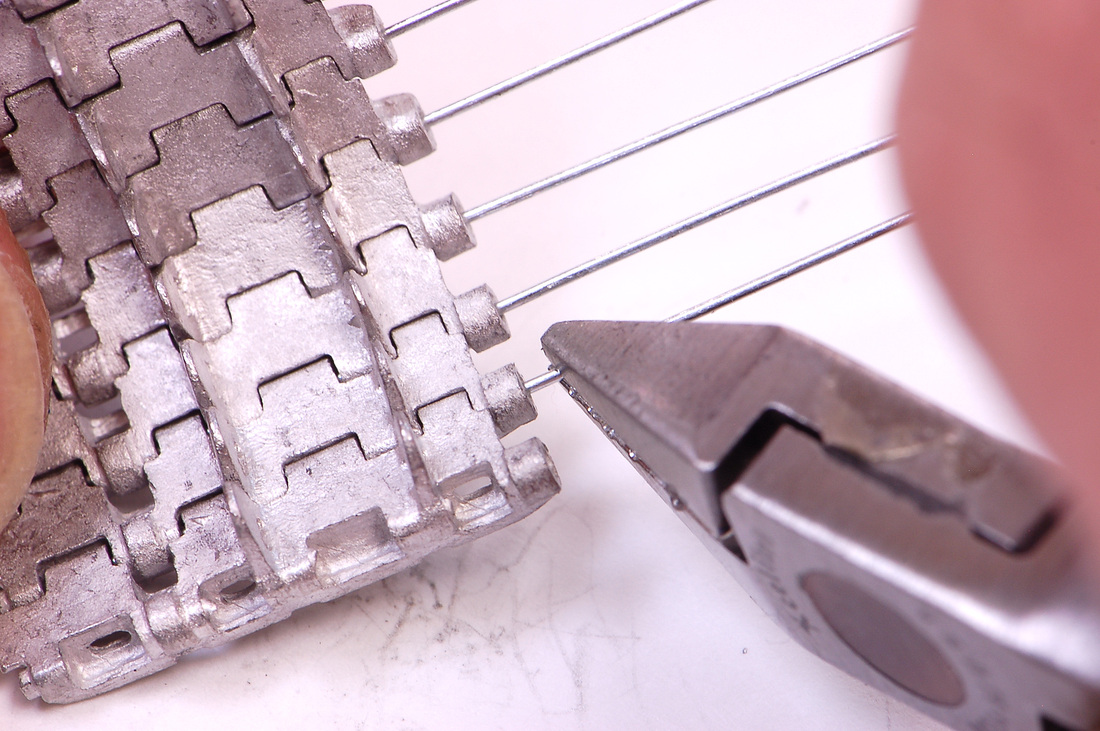 For tracks that have a recessed bolt head like these Tiger1 tracks, I pull out the wire about 2 to 3mm from where it bottomed out and cut it there. 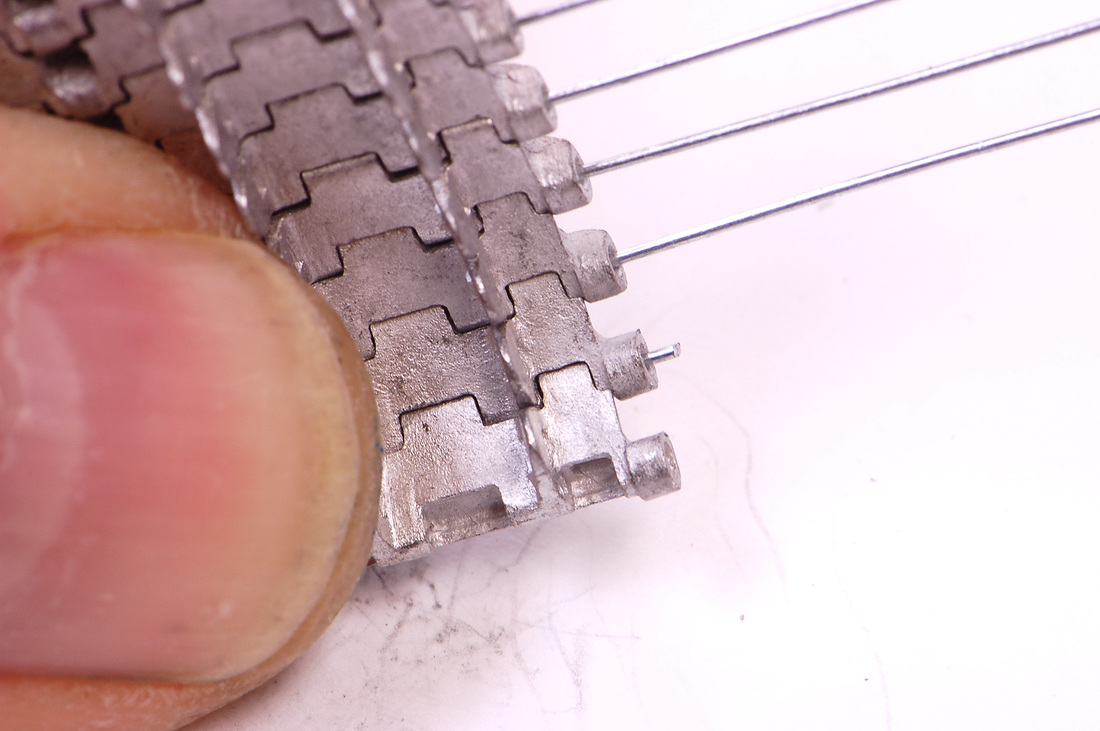 This leaves a little nub sticking out that can be pushed back in the bore... 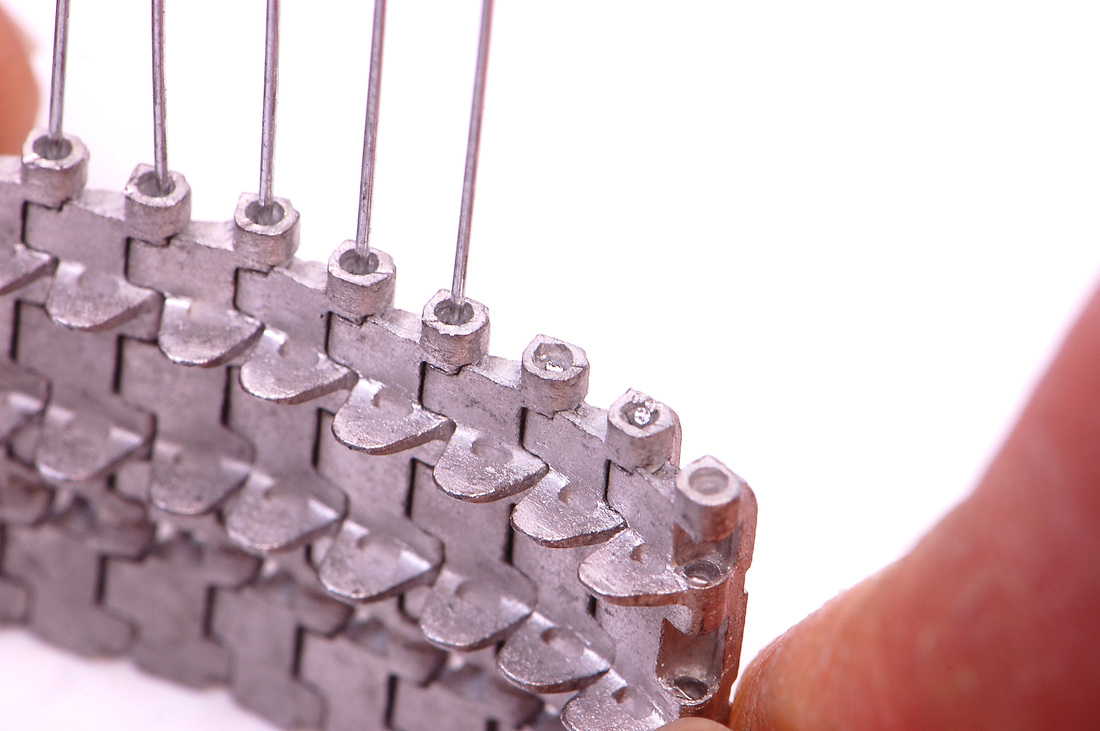 leaving the wire recessed as well. Notice the previous cut was done flush to the outside edge. It is not as clean but keep in mind if you ever need to remove any links having a little nub to grab aids tremendously. I also leave about 5mm of wire sticking out of say the last 6 links in case I need to shorten the run once the tracks are on the model. When I have my final length and tension set I then flush cut those remaining links. On final assembly or while mocking up I always leave one master wire link on the inside of the run as my removable pin. This helps even after the model is completed if I need to remove the track runs for any reason. You can also leave a couple as tracks may stretch and a may need to be shortened later.
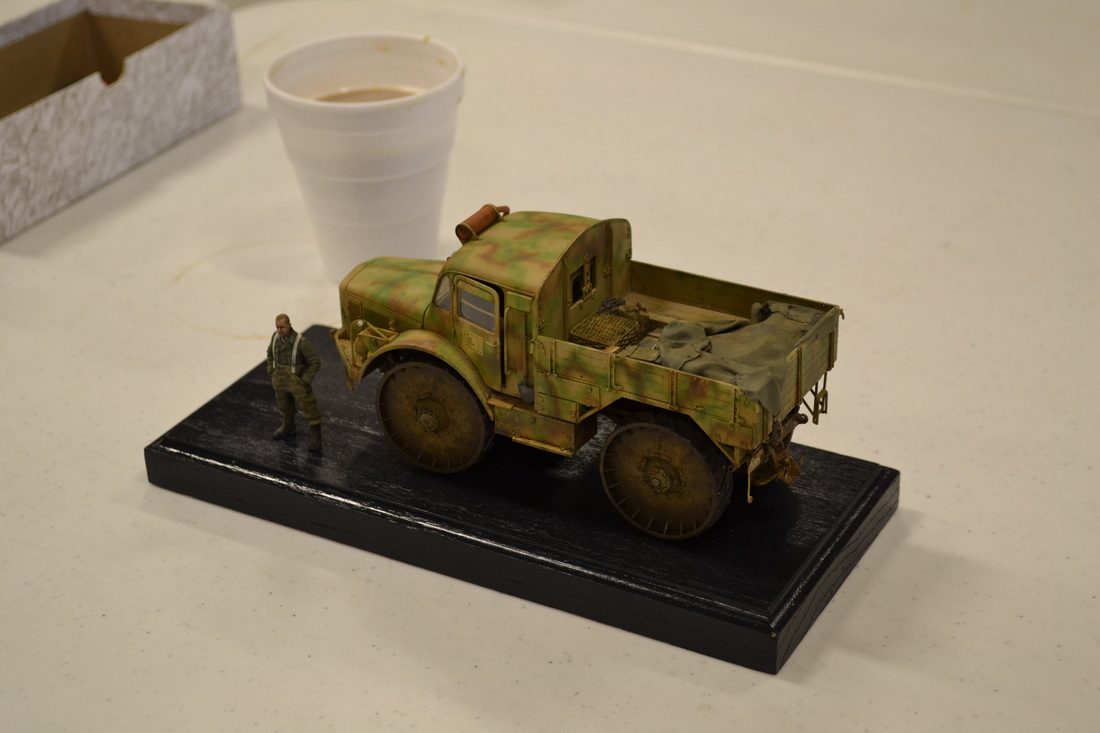
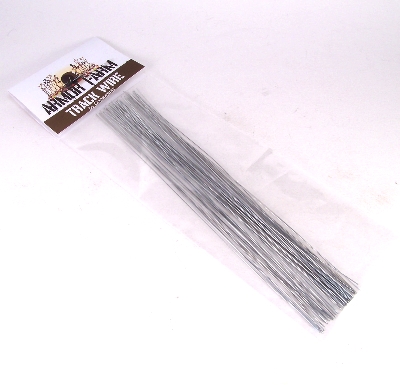 Over the years we have seen new techniques with building and painting, some have created their own offshoots and sub-techniques and others have may have just faded away. Sometimes the new technique may be accompanied by a new product or a common household product but the idea generally is to make the modelers life easier and possibly cut down the time on certian areas of the build so the modeler can focus more on other areas of interest. One aftermarket product that has been around for quite a while now are Fruilmodelisimo metal tack link sets. Some people love them, others prefer the plastic options, but one area that I think we can all agree on is the time consuming pain they are to put together. I have seen many different rituals from modelers on how they put fruils together, and quite honestly I felt there was alot of time wasted with pre-dilling each link, then measuring and pre-cutting all the track pins. Then to have to glue each pin after all was done, talk about time consuming!!! I tried this for a few sets of Fruils and decided there had to be a easier and less time consuming method. I was never fond of the wire that comes in the track sets as it is too flimsy, so I would use brass wire. The problem is that for a bag of 6 pieces of .022 brass wire is 4.00 dollars and what I started to develope as a assembly line technique wouldn't really speed things up at all unless I upped the quantity of wire. Around this time I sourced some wire that had a very unique configuration so I tried it on the track and was pleasently surprised as it did exactly what I needed it to do. The method I came up with is explained in the captions and based on the quantity of wire sold in the Track Wire pack. I can finish two runs for most tank models based on roughly 72 to 92 links per side in about a hours time. There is enough Track Wire to complete 3 to 4 wide track tanks(merkava,chally,tiger1/2) and 4 to 5 smaller tracks(panzer 3/4,38t ect.). Best thing is due to the unique shape of the Track Wire no pre-drilling or glueing is necessary and this is what aids in cutting down the pain factor of putting tracks together. I have assembled 17 sets of Friuls with this wire and technique and have not once used glue so my tracks have a free sag and drape perfectly with no tight spots. The confirmation of the Track Wire and the SD method was when I had fellow cohort and Armour Model Master Chris Jerrett over to my crib and heard his horror stories of Fruil assembly so I pulled out a run I was doing for a Cent. AVRE and quickly showed him how I rocked it out. I gave him a pack of Track Wire and when he called me later in the week he told me that he had rocked out 4 sets of tracks for upcoming projects. No more screaming expletives and spending up to 3 hours per set. The dreaded task of assembling track runs is now just roughly about a hours worth of work, and as I said at the before this leaves much more time to enjoy other facets of building or painting. Who can't love that? I have also used the wire for grab handles, superglue applicator, and brakeline/hardlines. You can assemble your tracks however you like and try the wire, or try the SD method and your own wire, but combine the SD method and Track Wire and I hope you will see what I mean. Not bad for a truck dude to make track dudes life alittle easier!
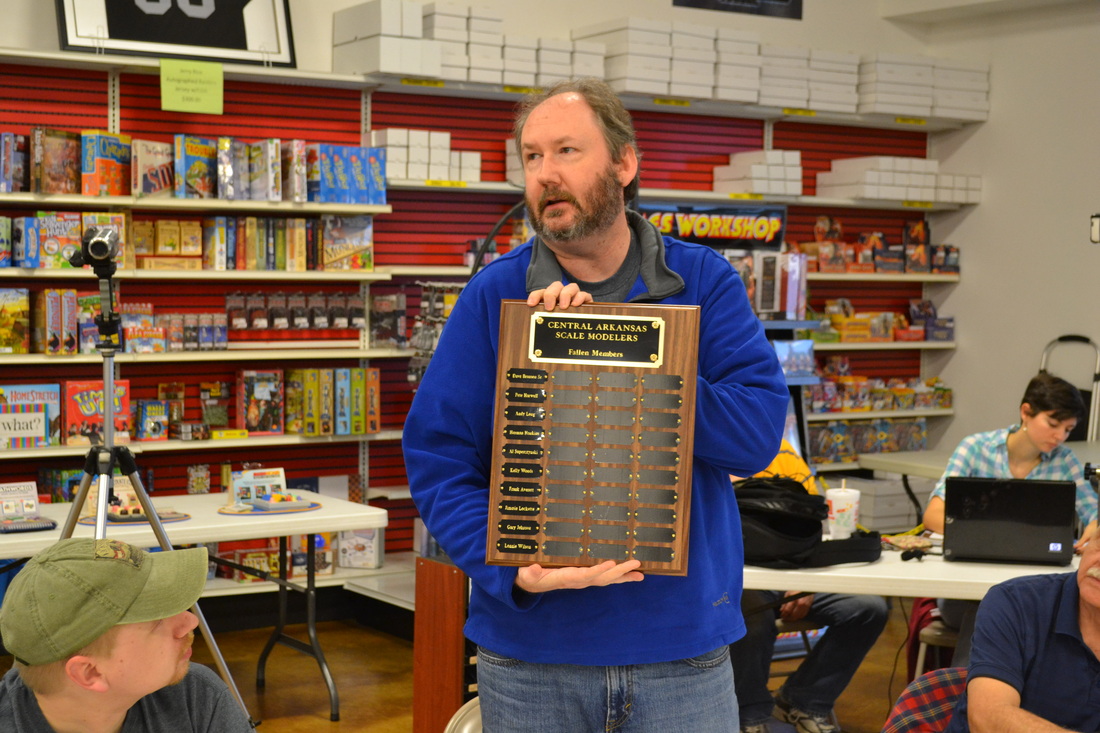
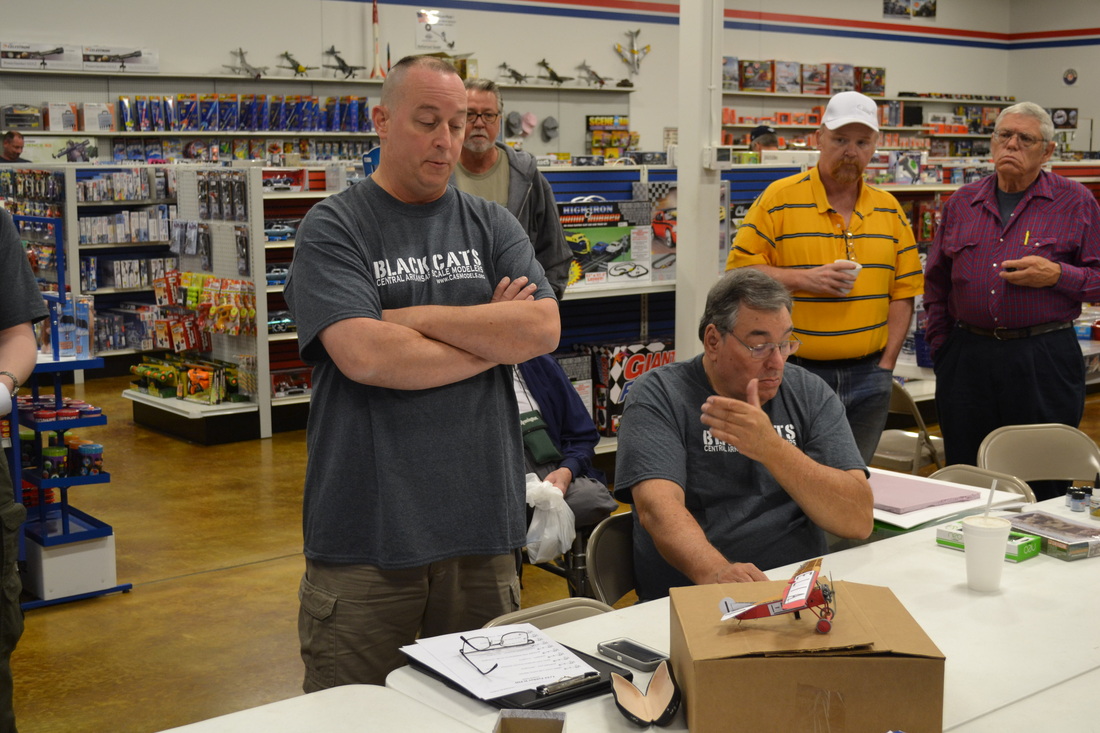
Step by Step guide to assembling Friulmodel tracks with Track Wire coming soon!  Central Arkansas Scale Modelers, in its current form, was born in 1999 and it became an official chapter of the International Plastic Modelers Society (IPMS) shortly thereafter. It has been the desire of CASM members over the years to broaden our base and become a dual charter club and affiliate with the Armor Modeling and Preservation Society, or AMPS for short. While IPMS caters to a very broad spectrum of model interest, AMPS targets the armor-modeling genre specifically. AMPS has its own shows across the country each year, but its membership is not nearly as large as IPMS.
By becoming an affiliate of AMPS, the CASM club will be able to take advantage of more exposure and advertising within the AMPS network, as well as drawing in modelers that might not otherwise visit a strictly IPMS show. There are no changes required with the way that we already conduct our club to be an AMPS affiliate. The only requirement is to have at least one AMPS national member (which we do). An AMPS representative officer, John Charvat, came to the recent Sproo-Doo contest and finalized the process. As of now, Central Arkansas Scale Modelers is not only an IPMS chapter, but also an AMPS affiliate chapter. CASM is a thriving club and I believe that becoming a dual charter will only strengthen us. Click here for the AMPS website! -Kenneth Childres This was my first opportunity to visit this very long running show (over 30 years). I spoke with folks from the club and they said that attendance was down over the last couple of years in both modelers and vendors. Still, there were almost 300 models in the contest. Vendors consisted of mostly individuals selling kits, books and aftermarket items. There were some VERY good deals to be had. Of the 291 models nearly half of them were aircraft, the rest being split between cars, armor and misc. There were only 1 or 2 figures present. I was surprised at the small number of space subjects given Huntsville's ties to NASA and Redstone Arsenal. I entered three pieces in the contest and was awarded two 1st places and one 3rd. The third place was in armor soft skins where I was solidly beaten by a guy I know from Atlanta and another gentleman. I was quite happy with the outcome and what I took away was that it's time to step up my game! I enjoyed the Huntsville IPMS show a lot. I thought the judging was thorough and fair in the categories I entered. I cannot speak of the others of course. The venue is located very close to an awesome veterans museum and probably the best Mexican restaurant I have ever eaten at. I would recommend the trip over to anyone so inclined. -Kenneth Childres |